

こんにちは。Tomoyuki(@tomoyuki65)です。
これまでのアプリ開発といえばネイティブアプリ(JavaでAndroidアプリ、SwiftでiPhoneアプリをそれぞれ開発)が主流でしたが、最近ではFlutterやReact Nativeなどによるクロスプラットフォーム開発(一つの言語でAndroidとiPhoneアプリの両方を同時開発)が注目されています。
特にWebのフロントエンド開発で現在主流のReactやNext.jsのスキルを活かしてアプリ開発が可能なフレームワーク「React Native」がありますが、その支援ツールとしてのプラットフォームである「Expo」がめちゃめちゃ進化してきています。
ということでこの記事では、Expo(React Native)によるアプリ開発方法をまとめます。
目次
Expo(React Native)によるアプリ開発方法まとめ
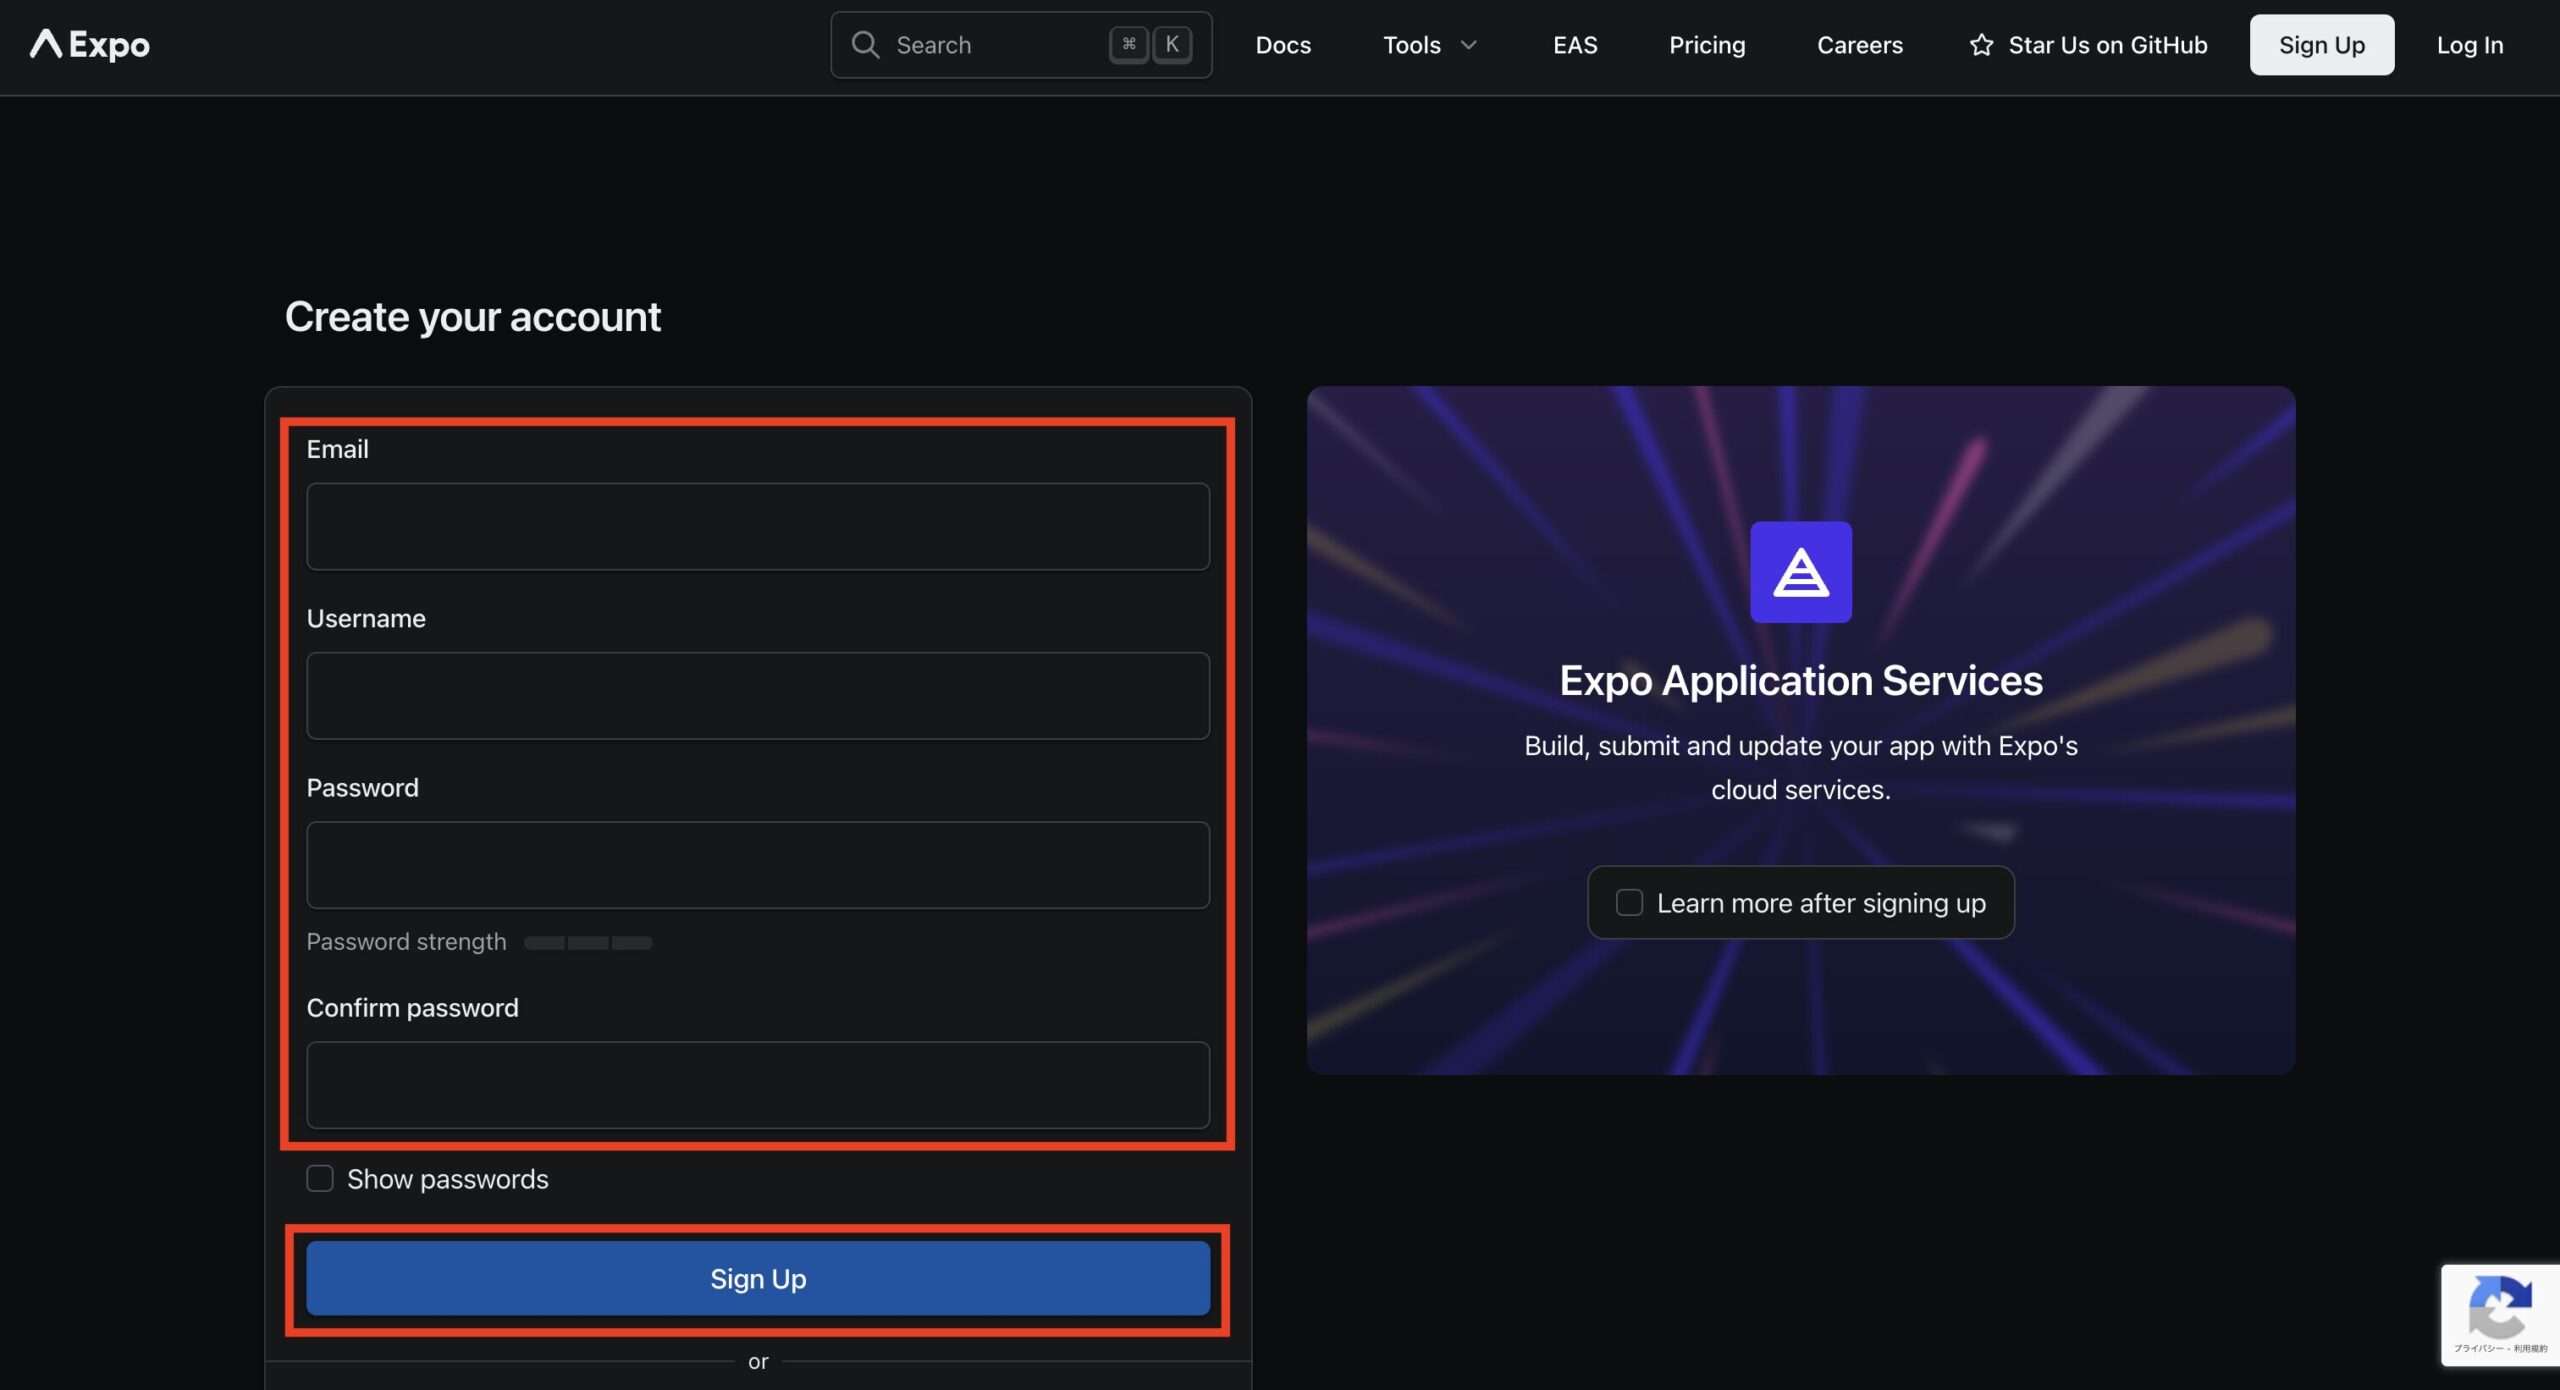
まずはExpoアカウントを作成します。Expoの公式サイトにアクセスし、「Sign Up」をクリックします。

次にEmail、ユーザー名、パスワードを入力し、「Sign Up」をクリックします。
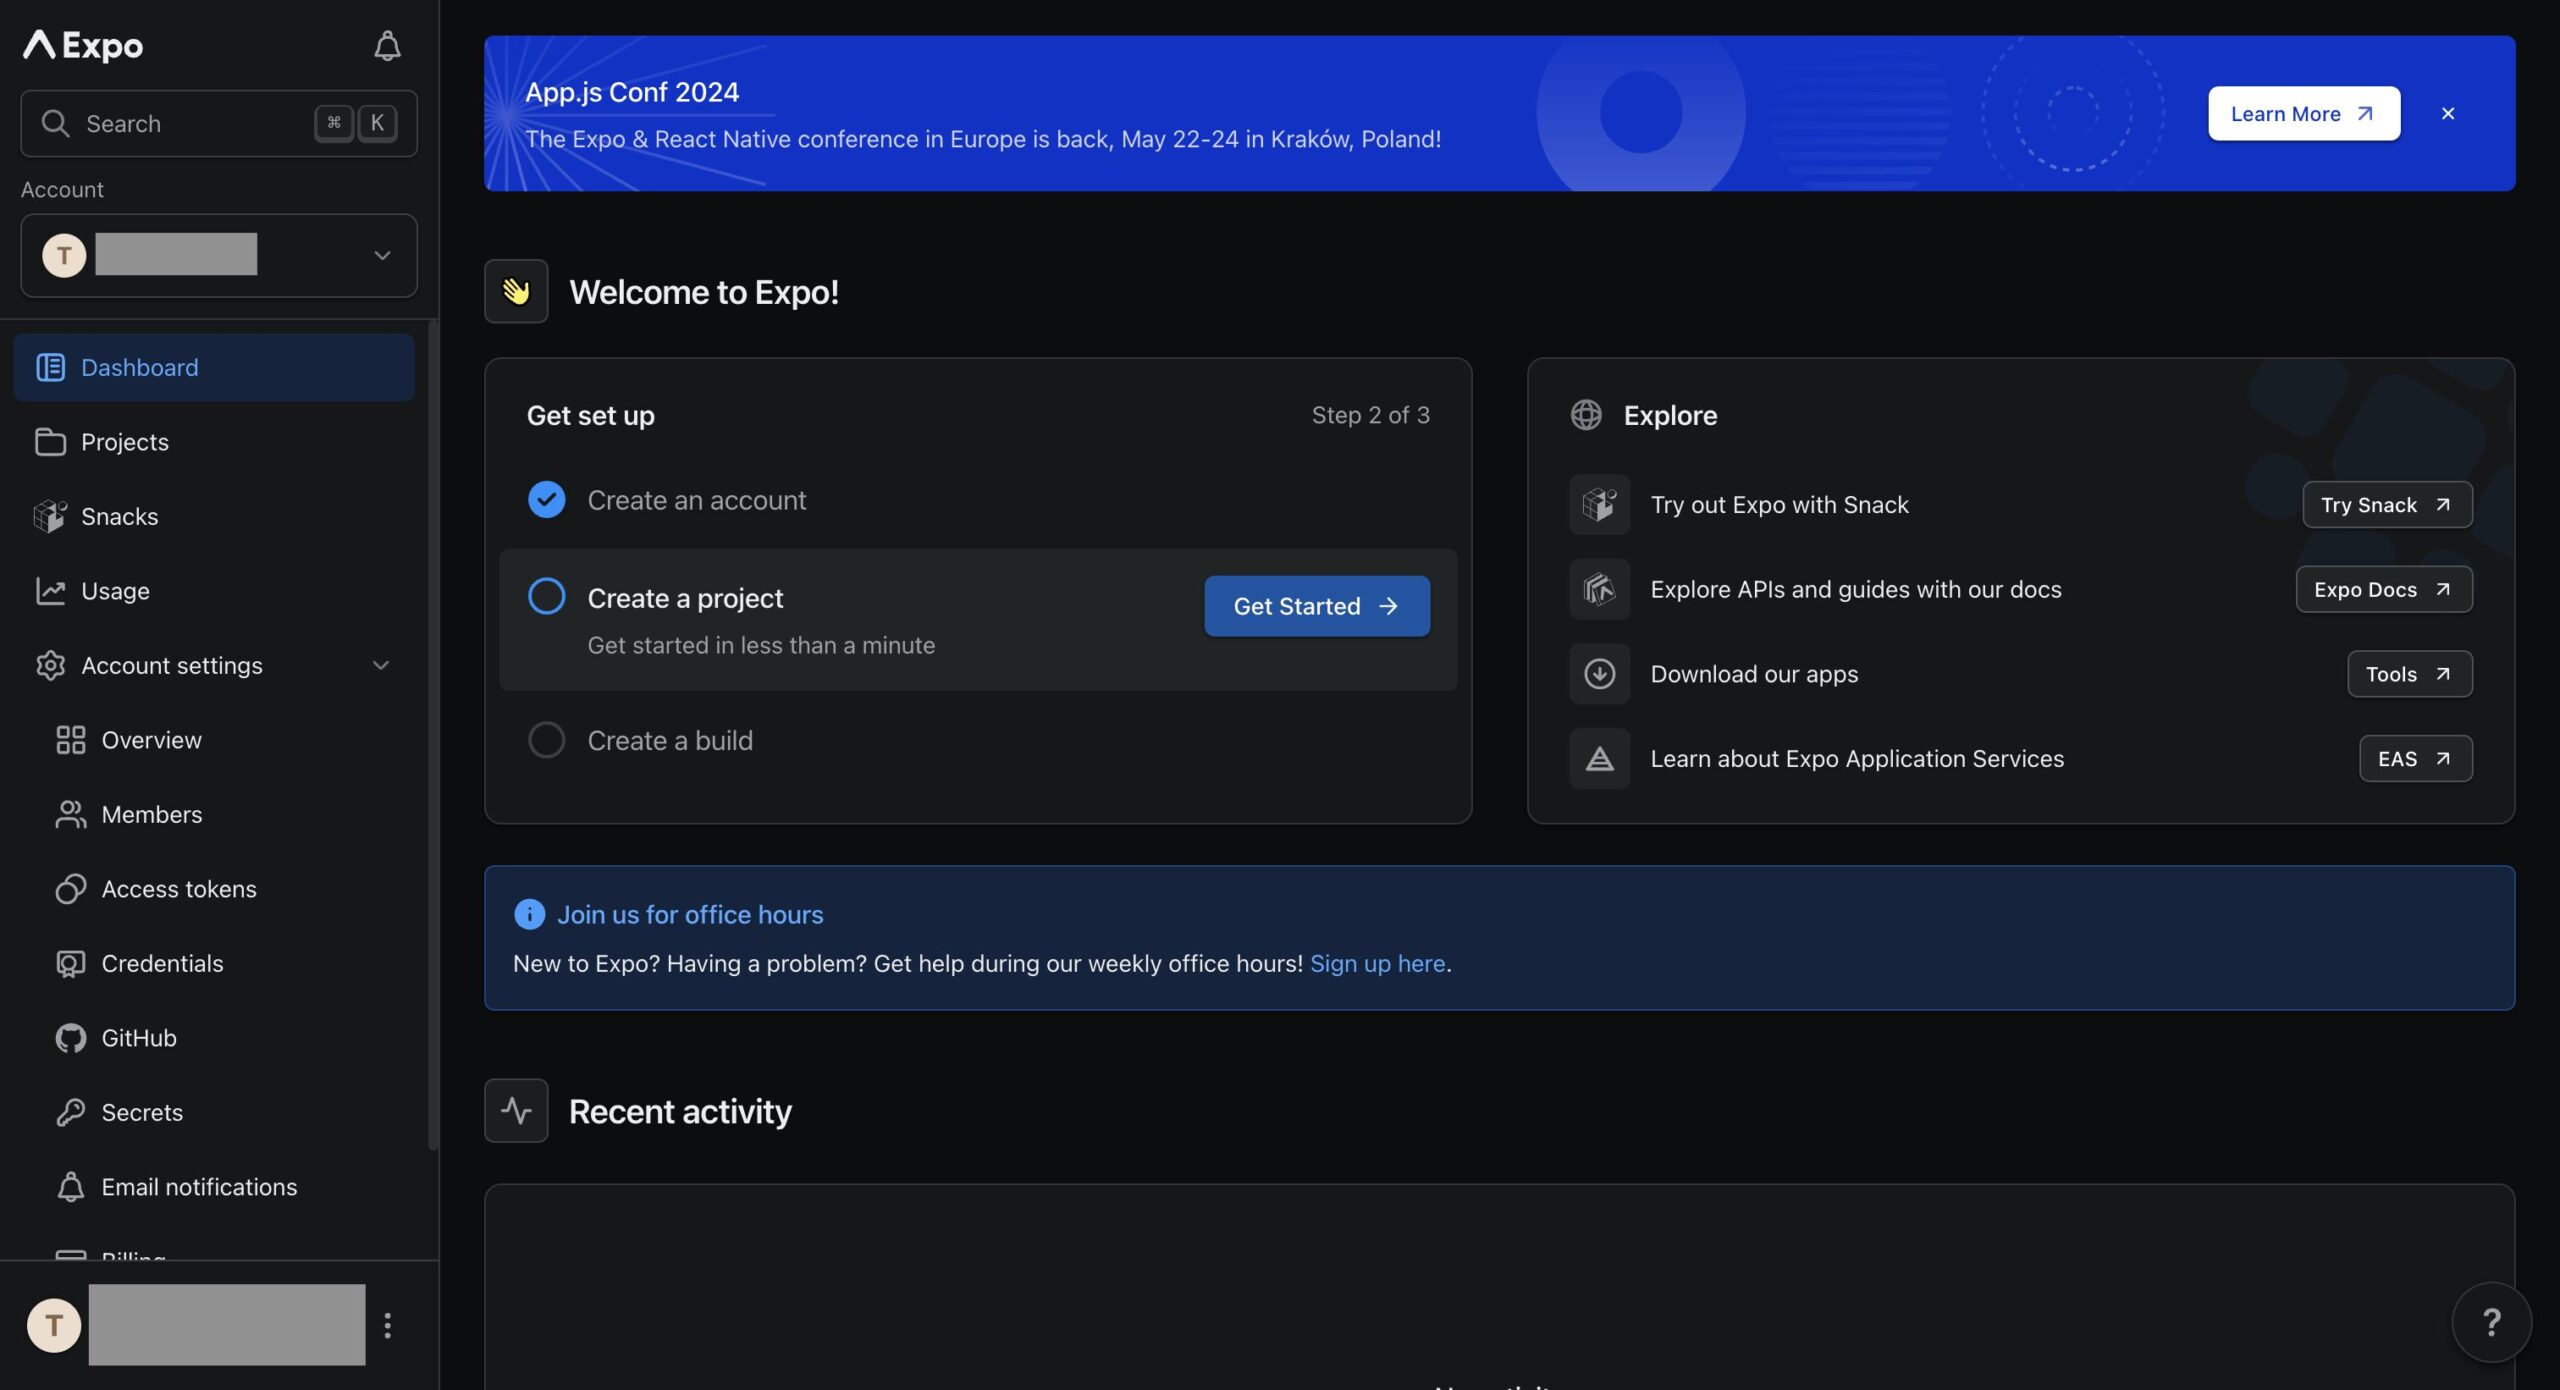
これでアカウントが作成されてログインできます。
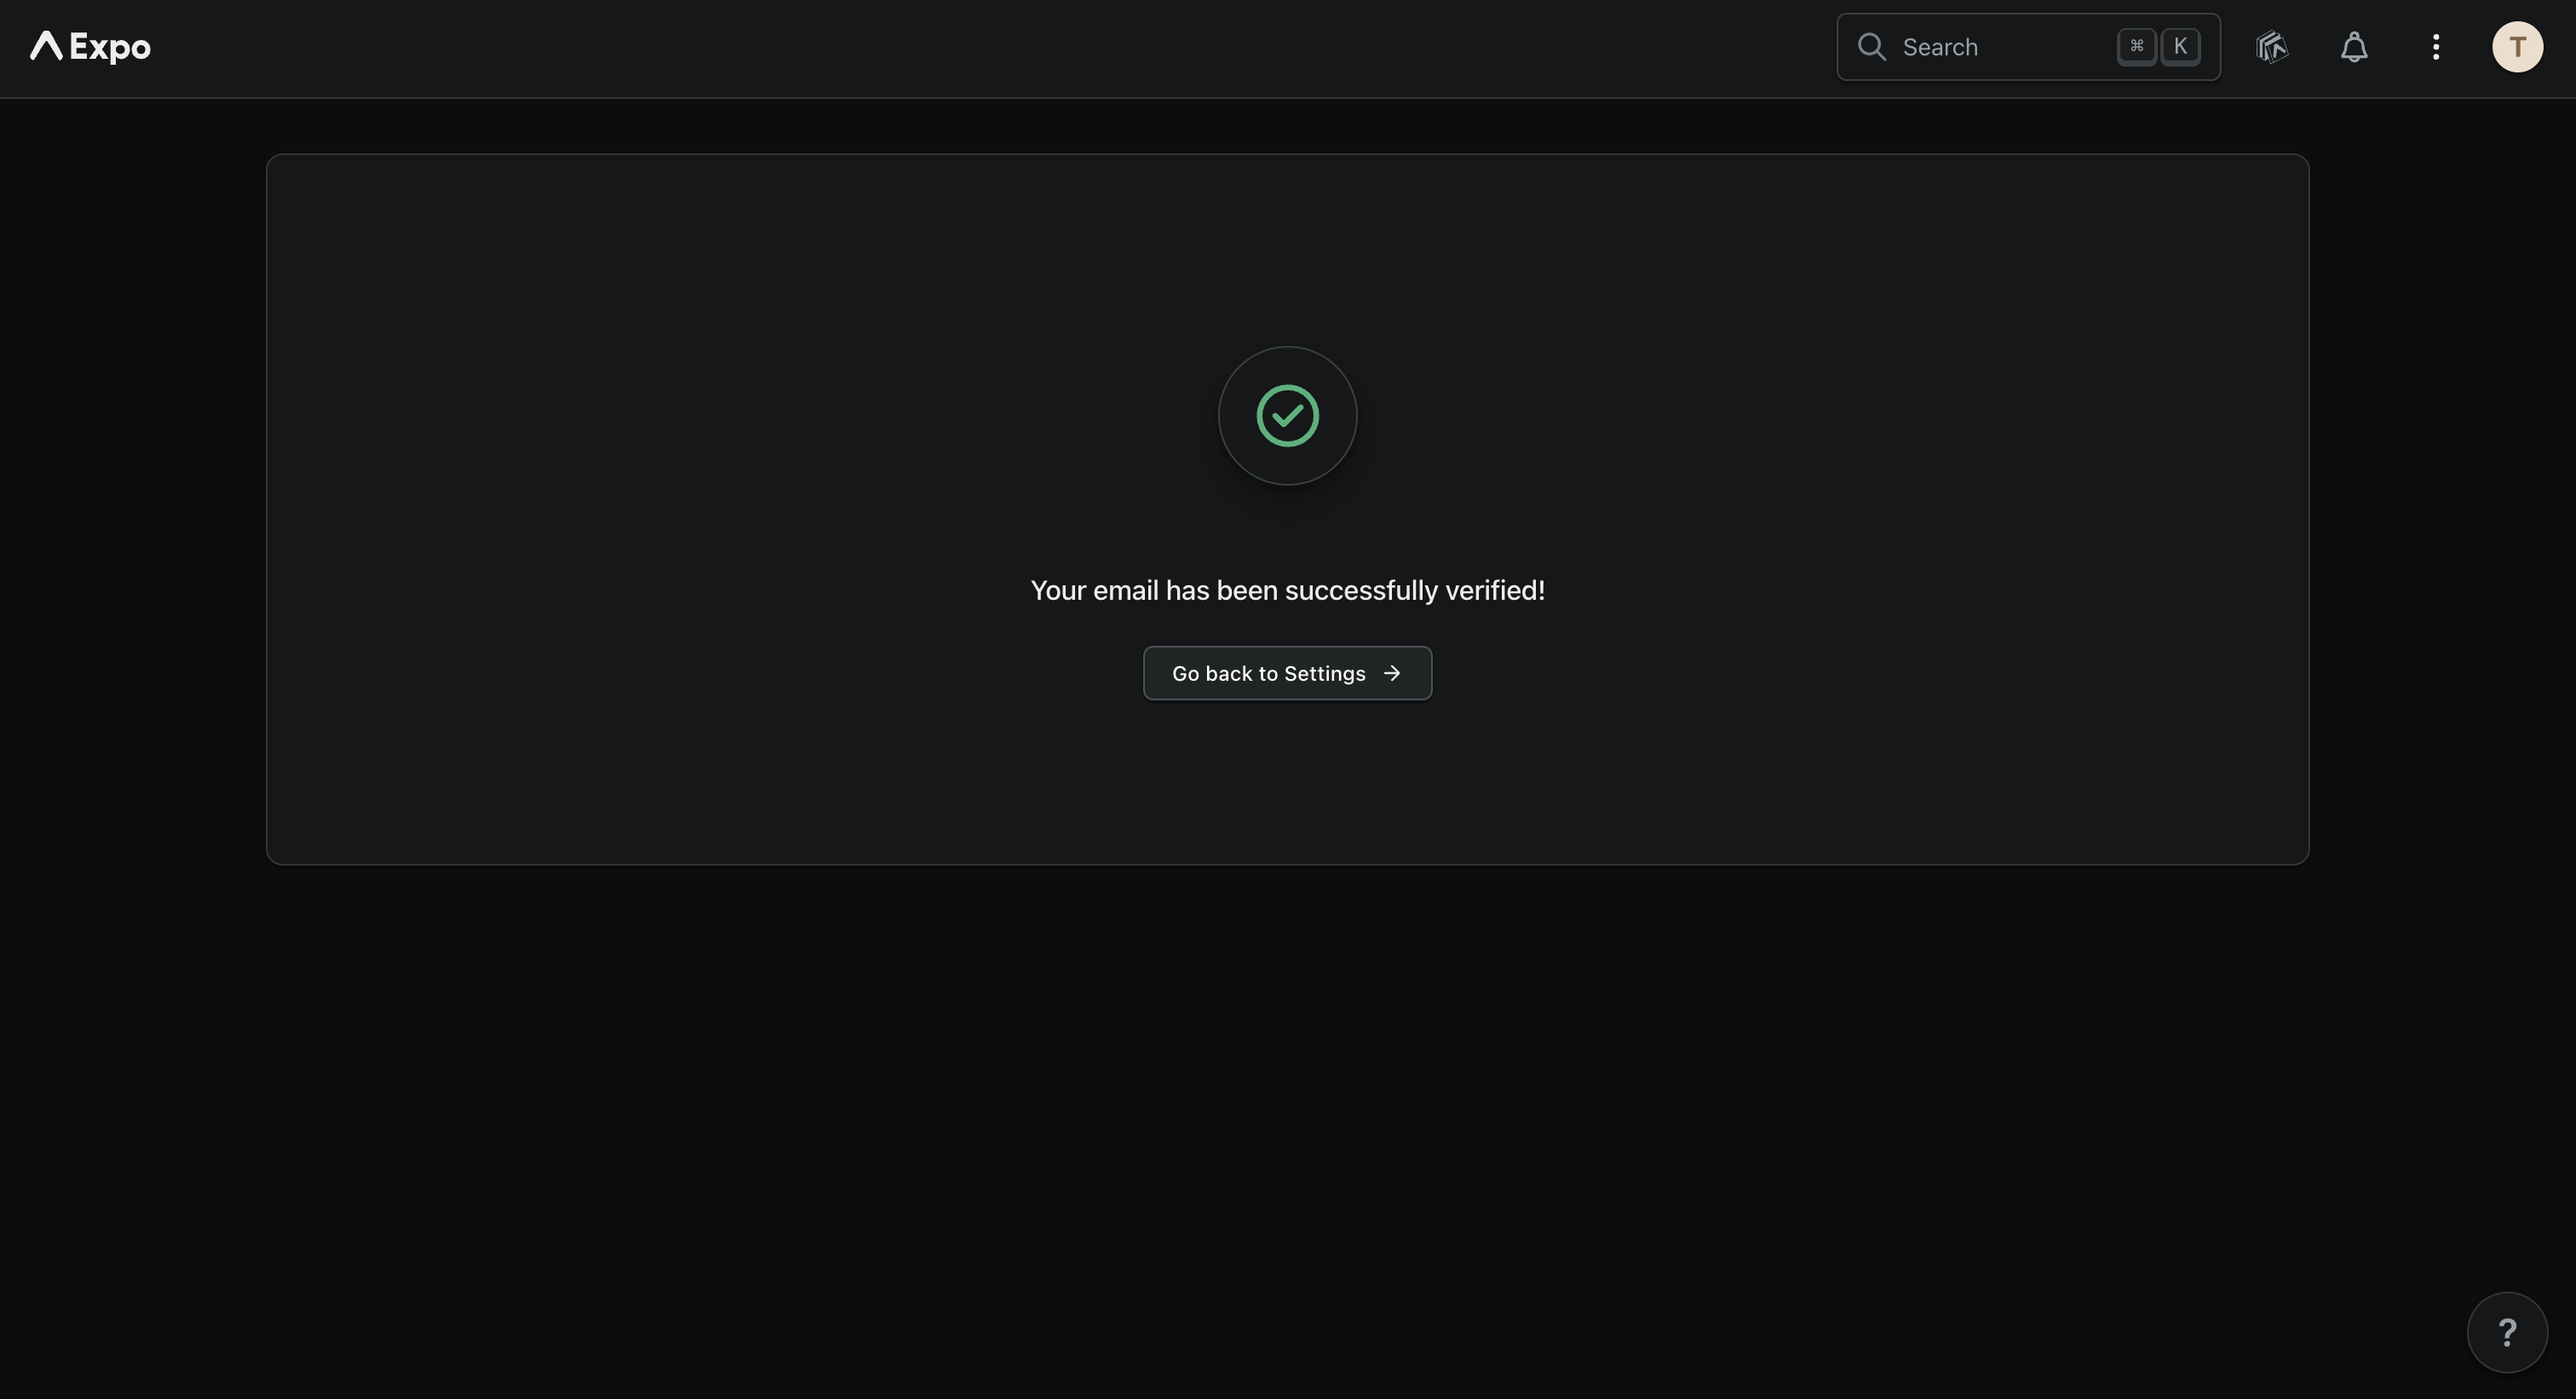
次にメール認証をするため、Expoから送信されるメールを開き、「Verify your email.」をクリックします。
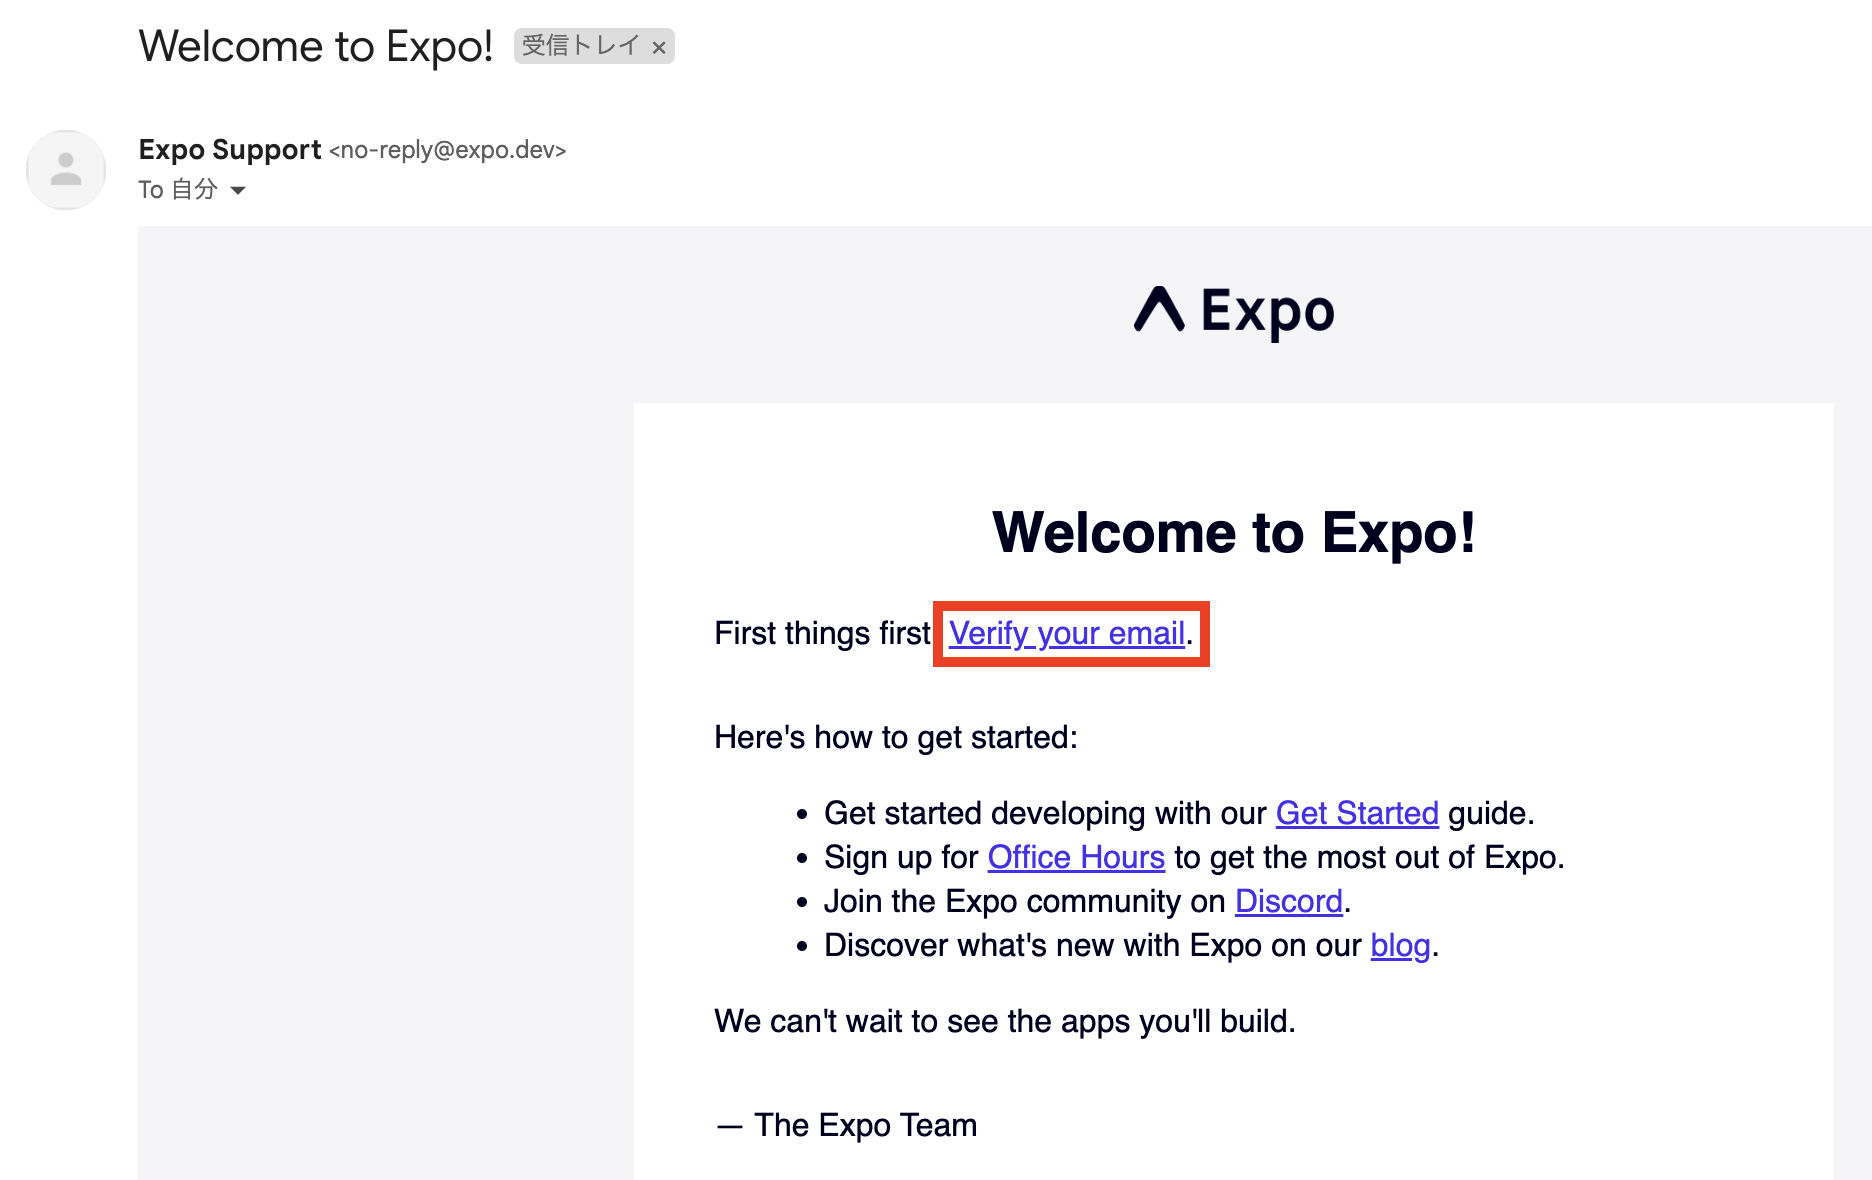
これでメール認証が完了です。
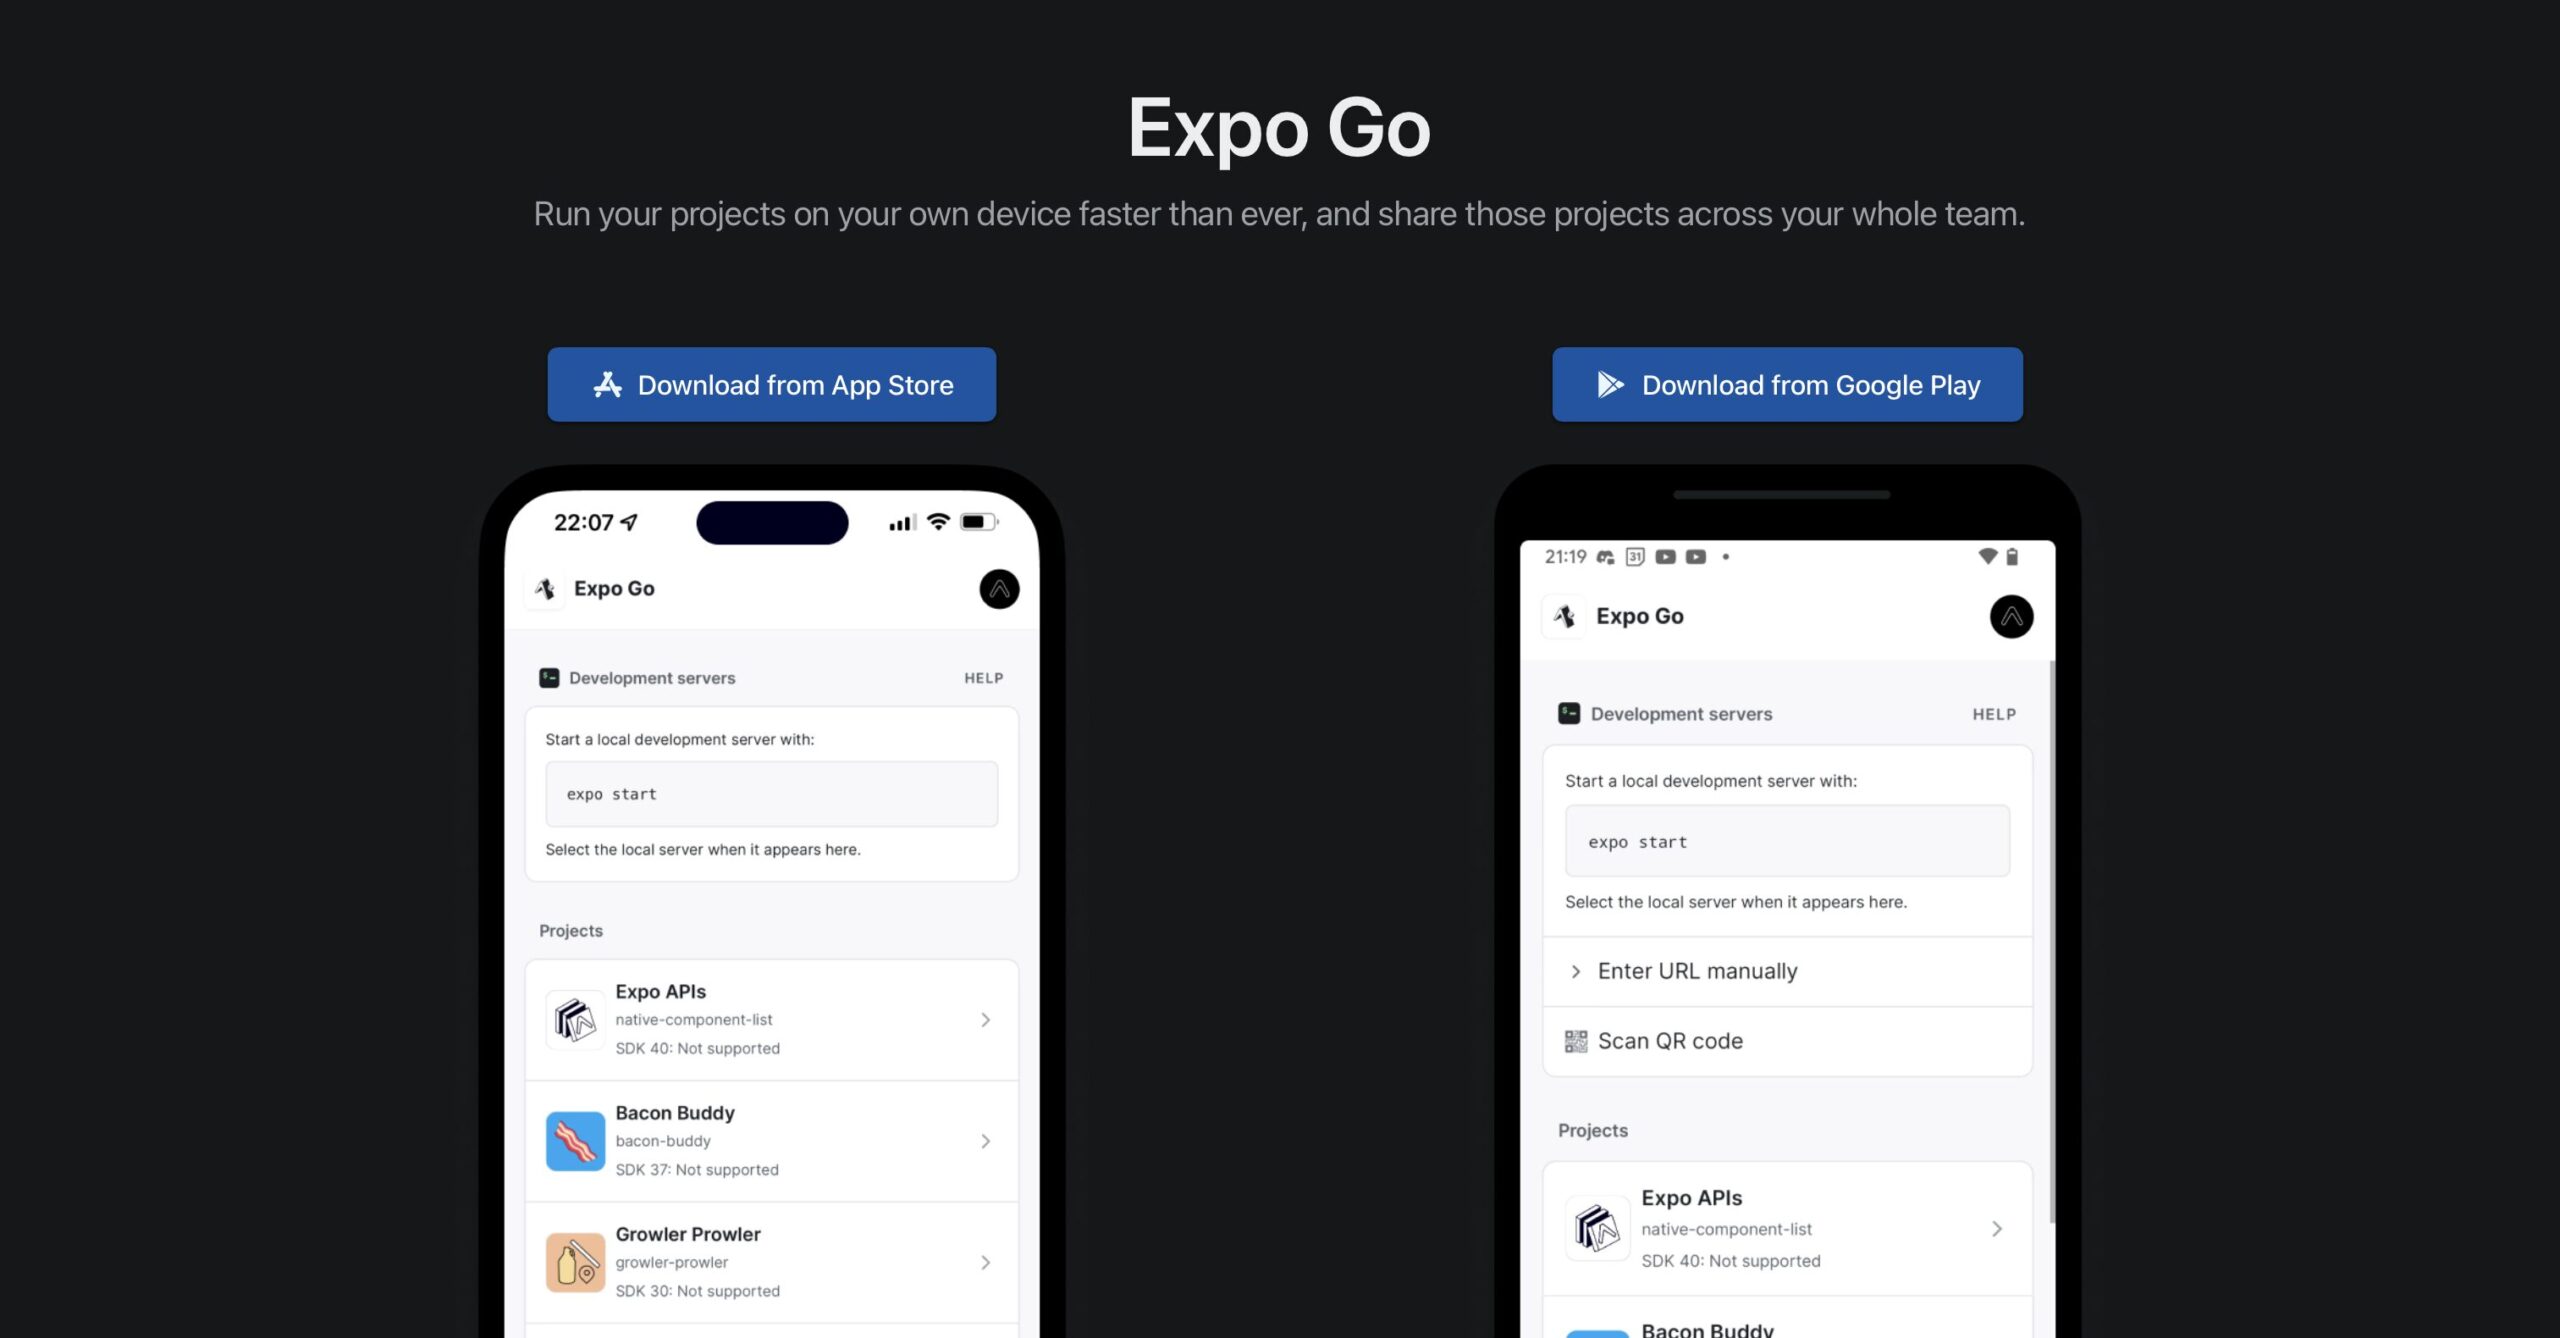
Expo Goのインストールとログイン
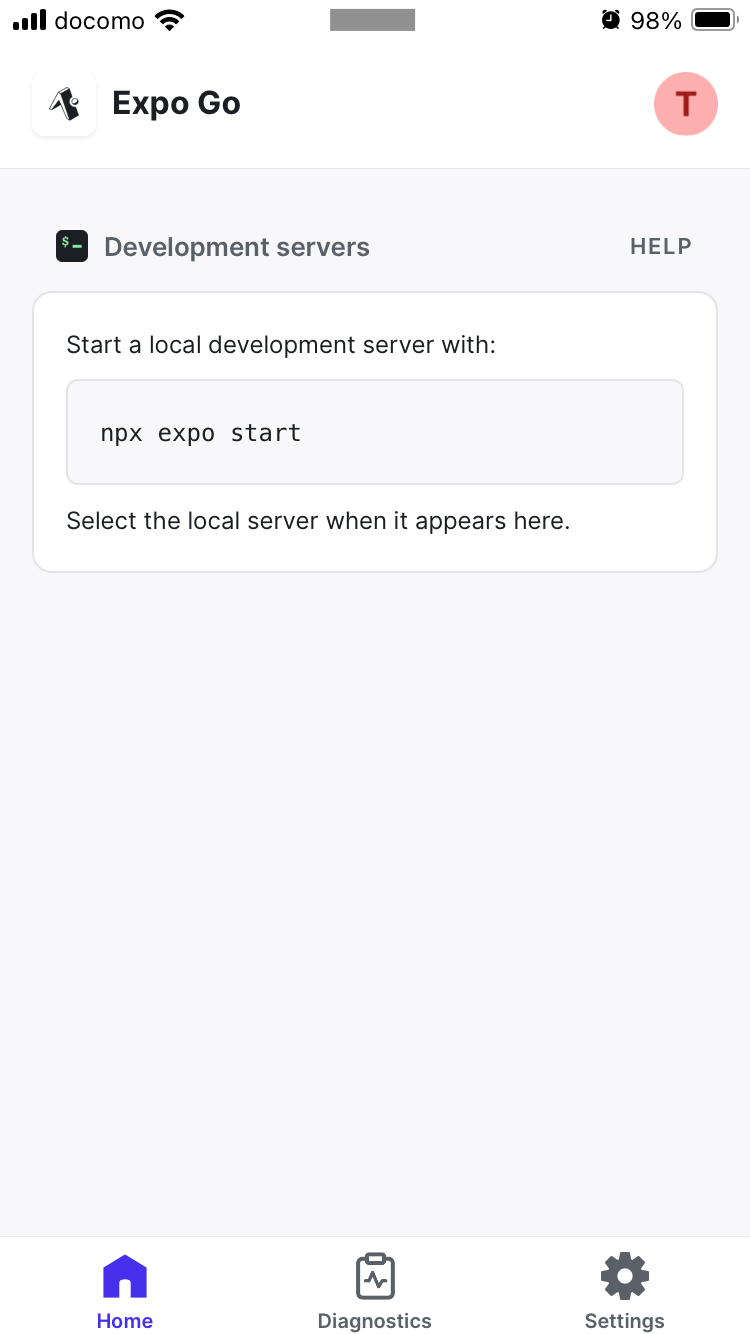
次に開発環境としてはお手持ちのAndroidスマホまたはiPhoneを使用するため、Expoの専用アプリ「Expo Go」をインストールします。
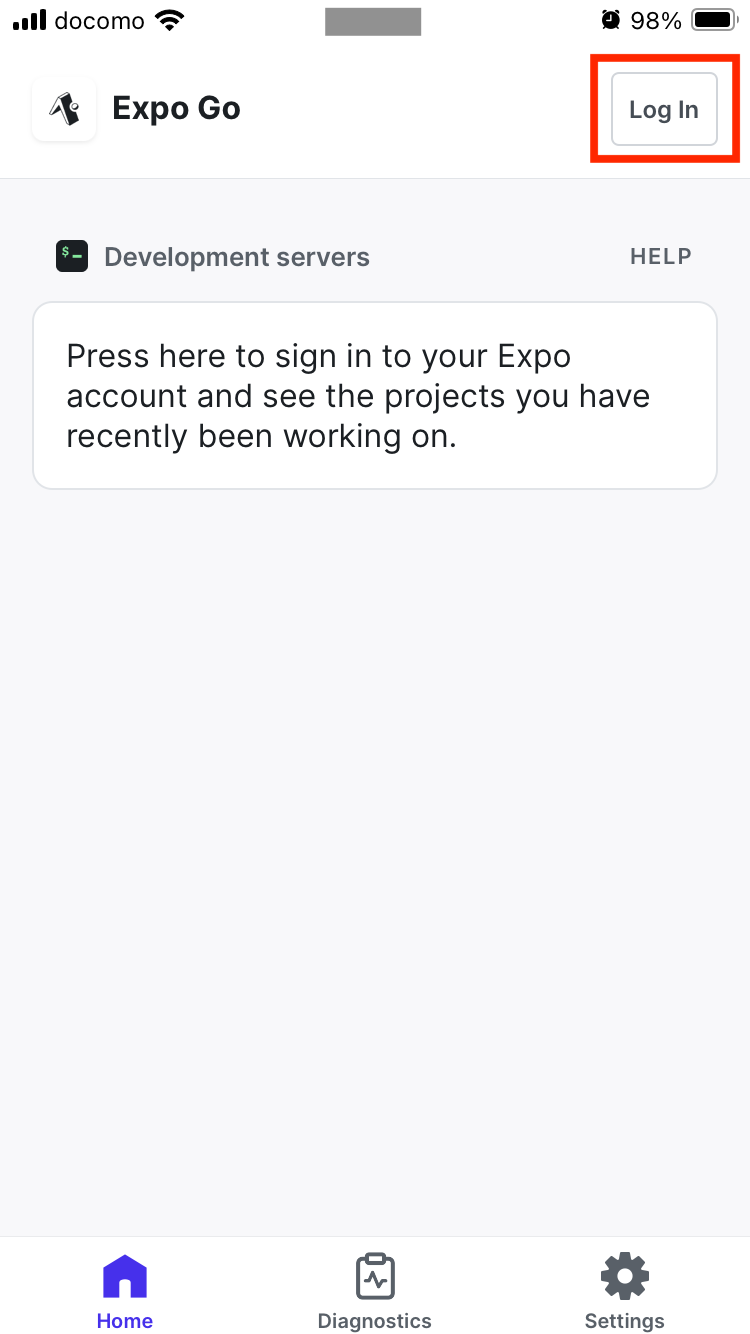
アプリをインストール後、画面の「Log In」をタップします。
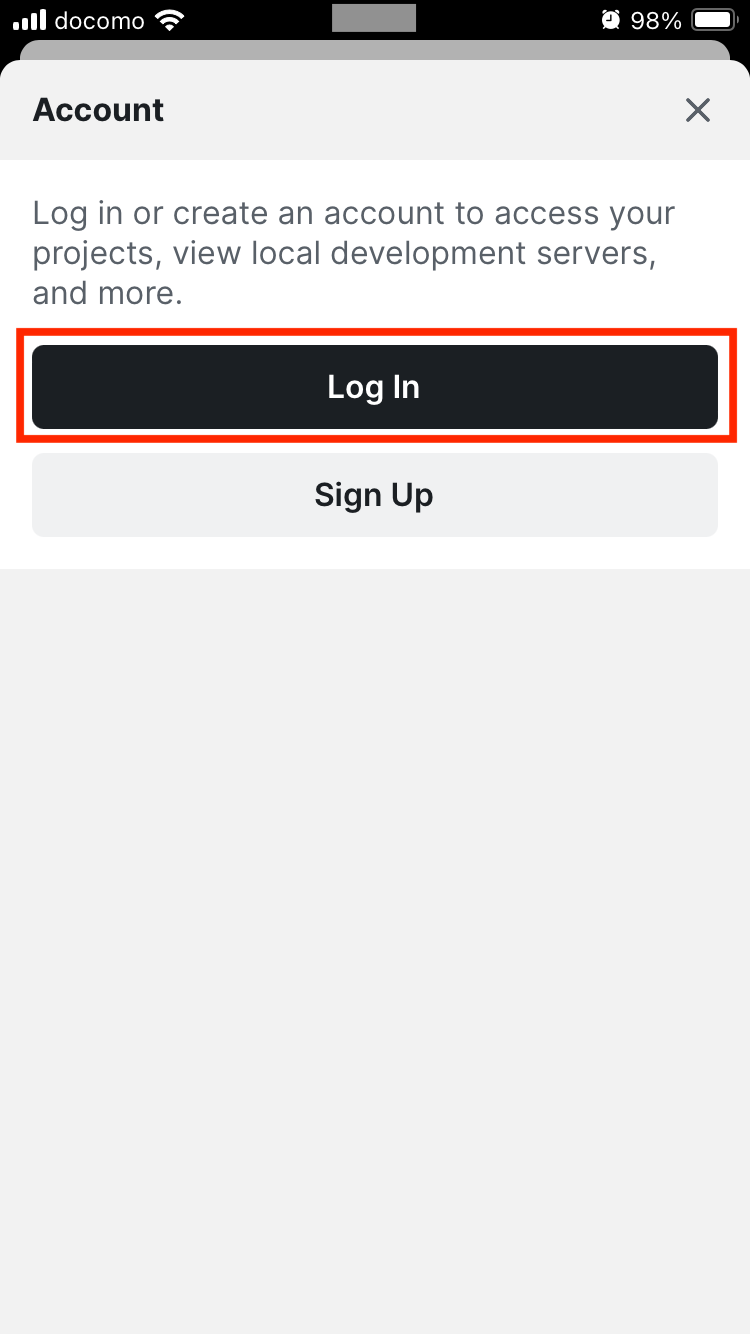
次に「Log In」をタップします。
次に事前に作成したアカウトにログインするため、Emailまたはユーザー名、パスワードを入力し、「Log In」をタップします。
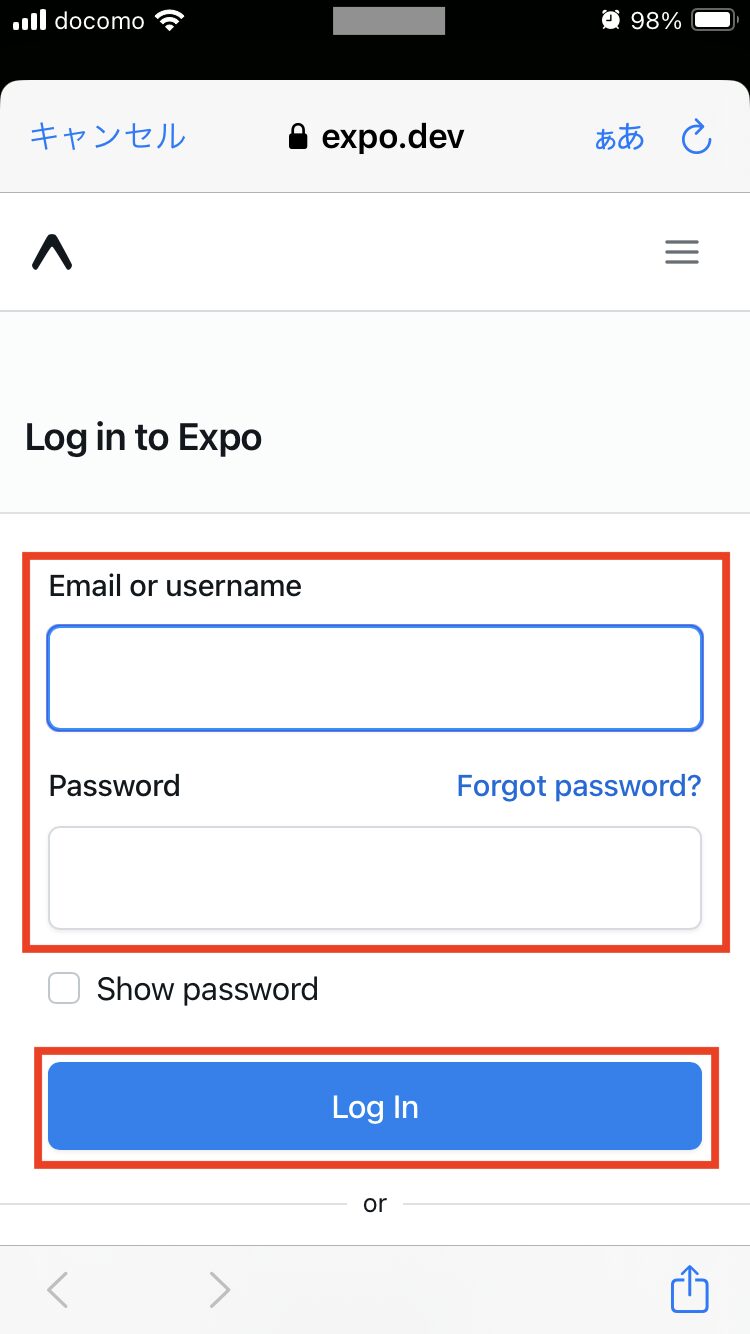
これでExpoアカウントへのログインが完了です。
Expo(React Native & TypeScript)のプロジェクト作成
次にExpoのプロジェクトを作成しますが、作成するのに必要なnodeなどについての説明は割愛しますので、まだ準備してない方は事前に準備をして下さい。
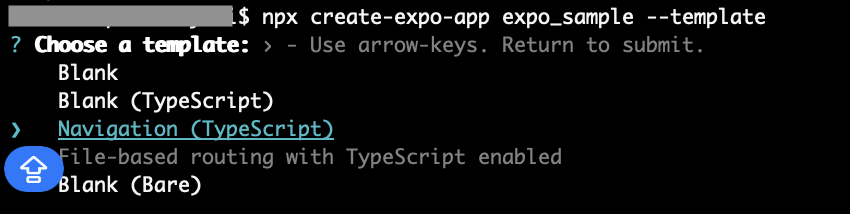
では以下のコマンドを実行し、テンプレートを使ってExpoのプロジェクトを作成します。
$ npx create-expo-app expo_sample --template
オプション「–template」付けた場合はテンプレートを選択できるので、「Navigation (TypeScript)」を選んでEnterを押します。
プロジェクト作成後、以下のコマンドを実行して作成されたディレクトリに移動し、合わせてgitのブランチ名もmainに変更しておきます。
※gitの詳細は割愛しますが、デフォルトのブランチ名が昔のmasterなのでmainに変更しておきます。
$ cd expo_sample
$ git branch -m main
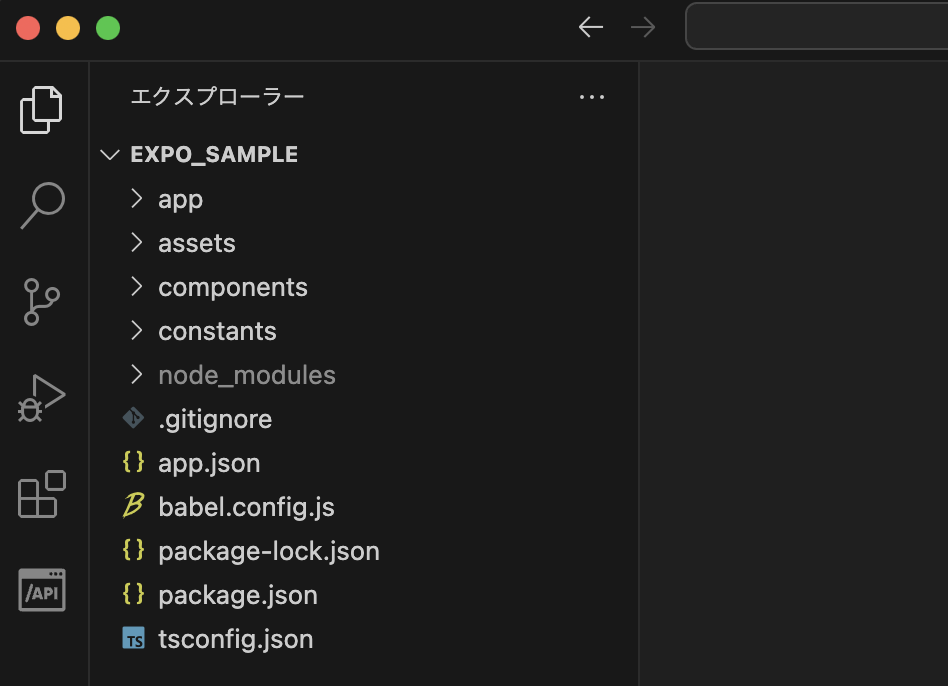
テキストエディタでディレクトリを確認し、以下のようにファイルが作成されていればOKです。
開発サーバーの起動とアプリの動作確認
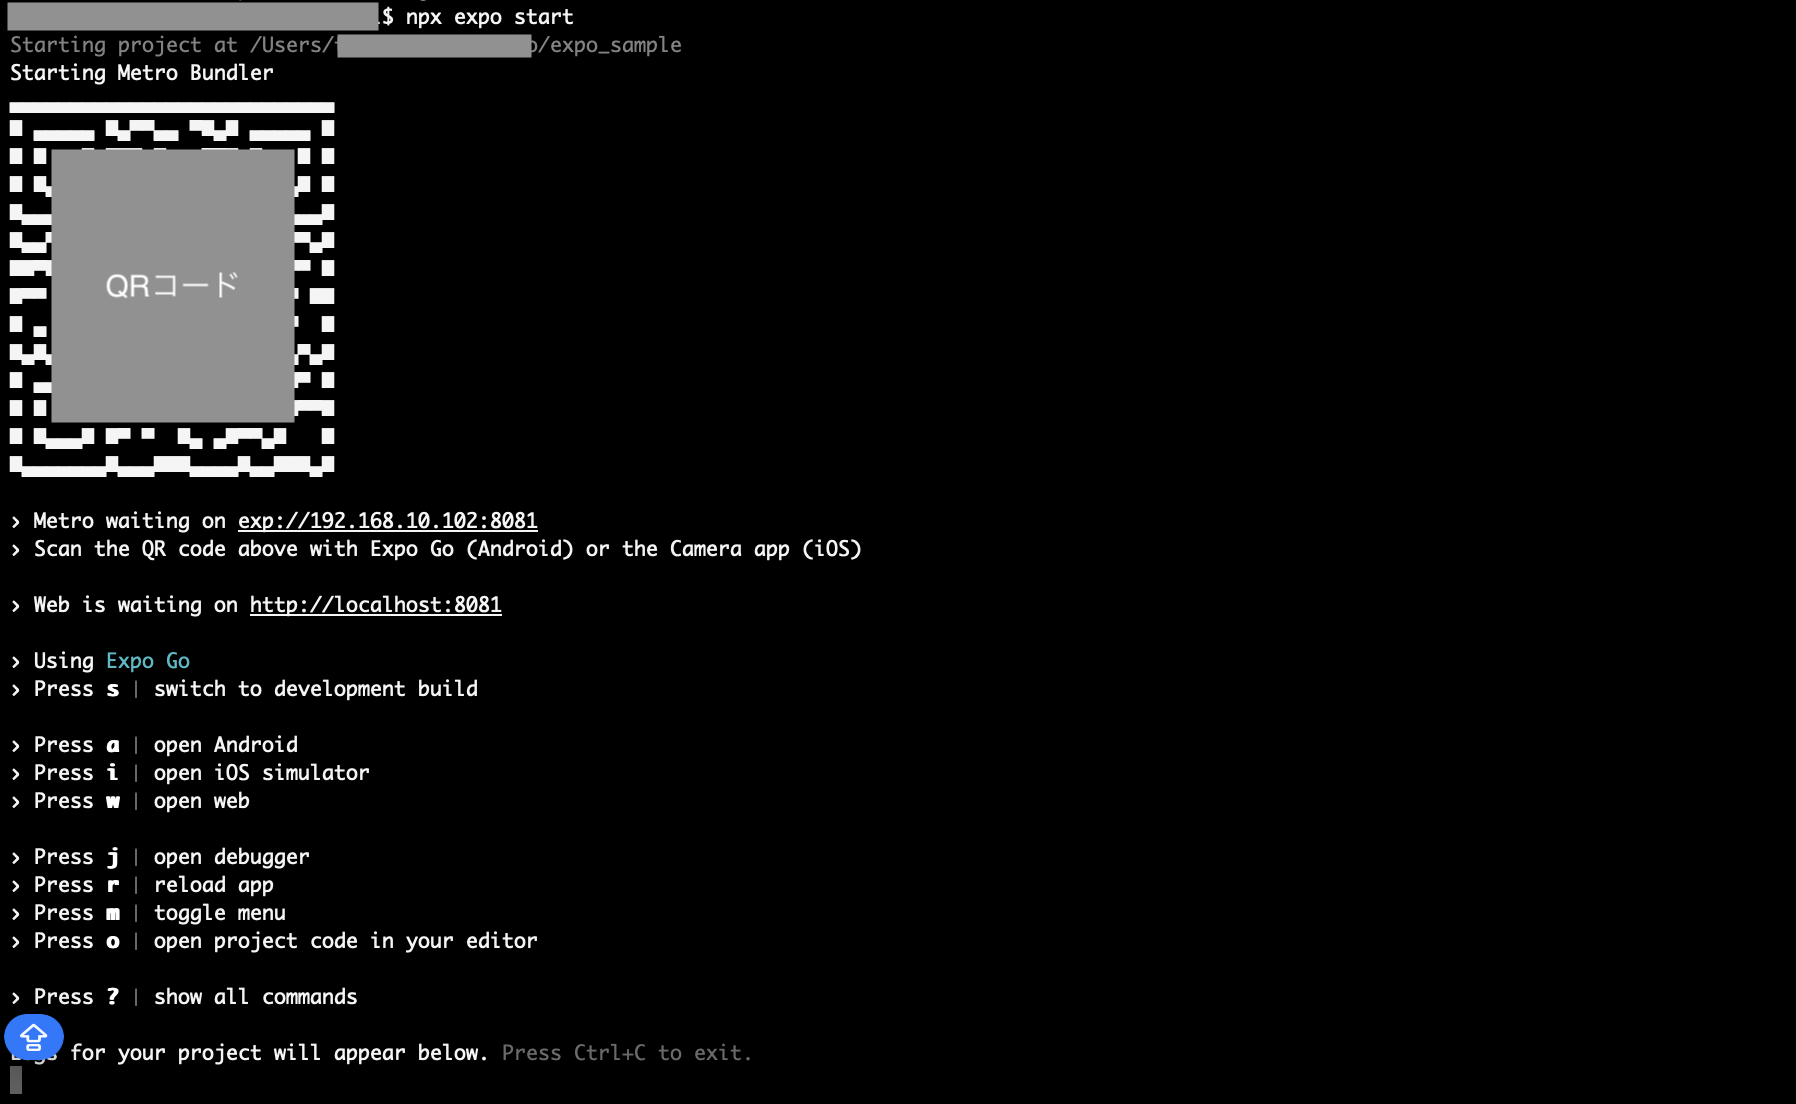
次に以下のコマンドを実行し、開発サーバーを起動させてアプリの動作確認をしてみます。
$ npx expo start
サーバーを起動させるとQRコードが出力されるので、アプリから読み取ります。
QRコードを読み込むと事前に準備したExpo Goのアプリが起動し、アプリの動作確認が可能です。
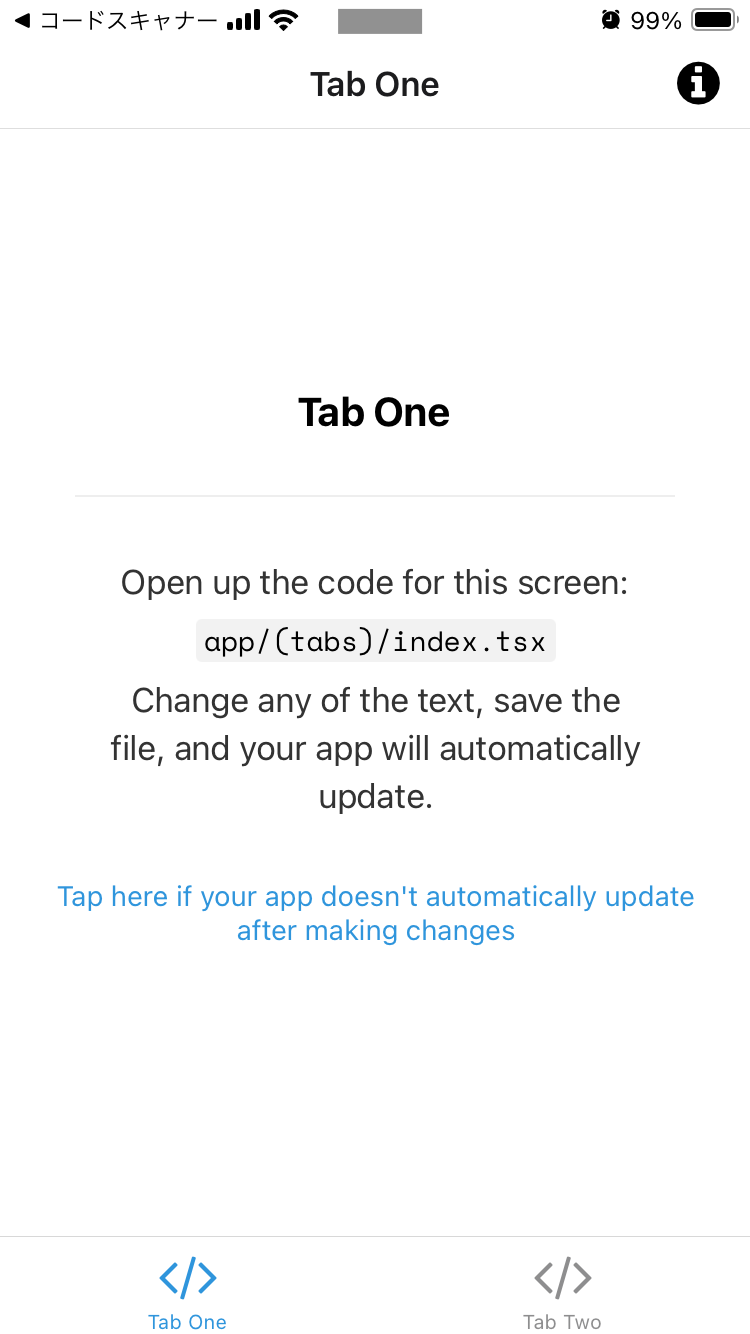
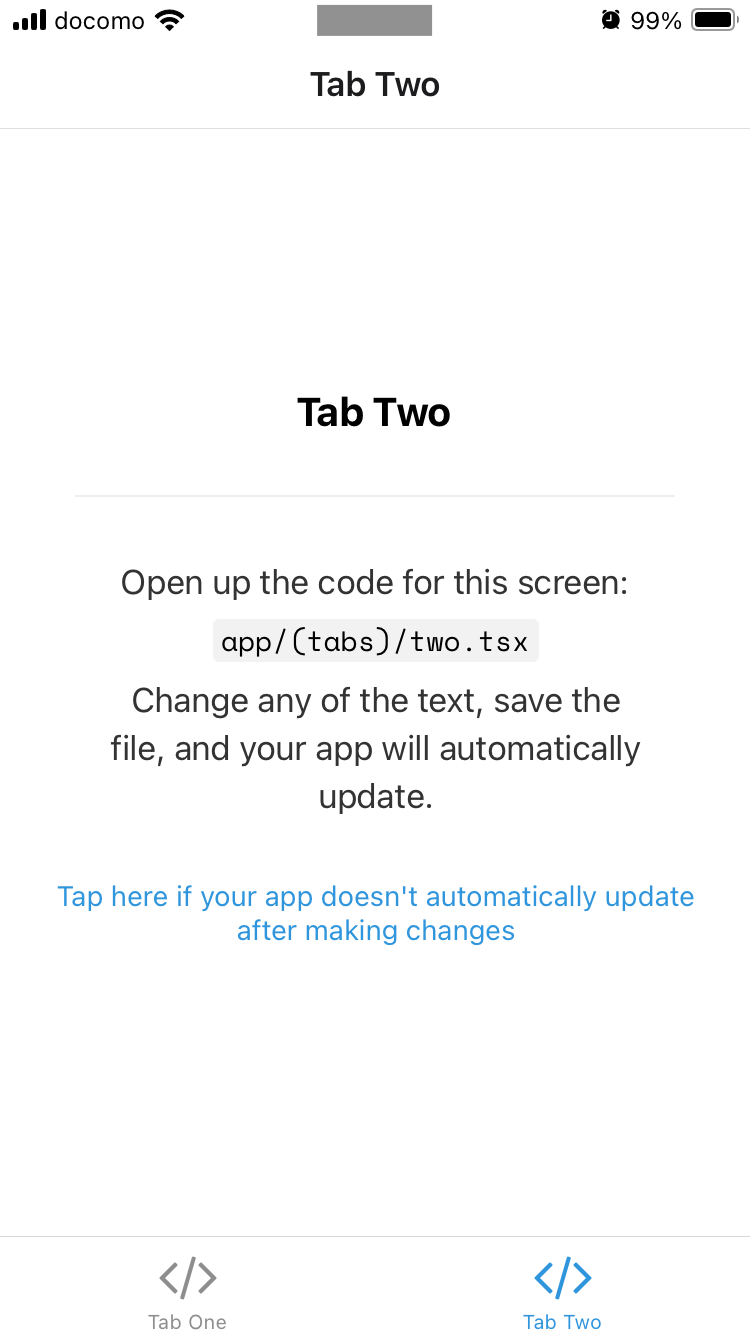
デフォルトのアプリでは、画面下の「Tab Two」をタップするとタブが切り替わります。
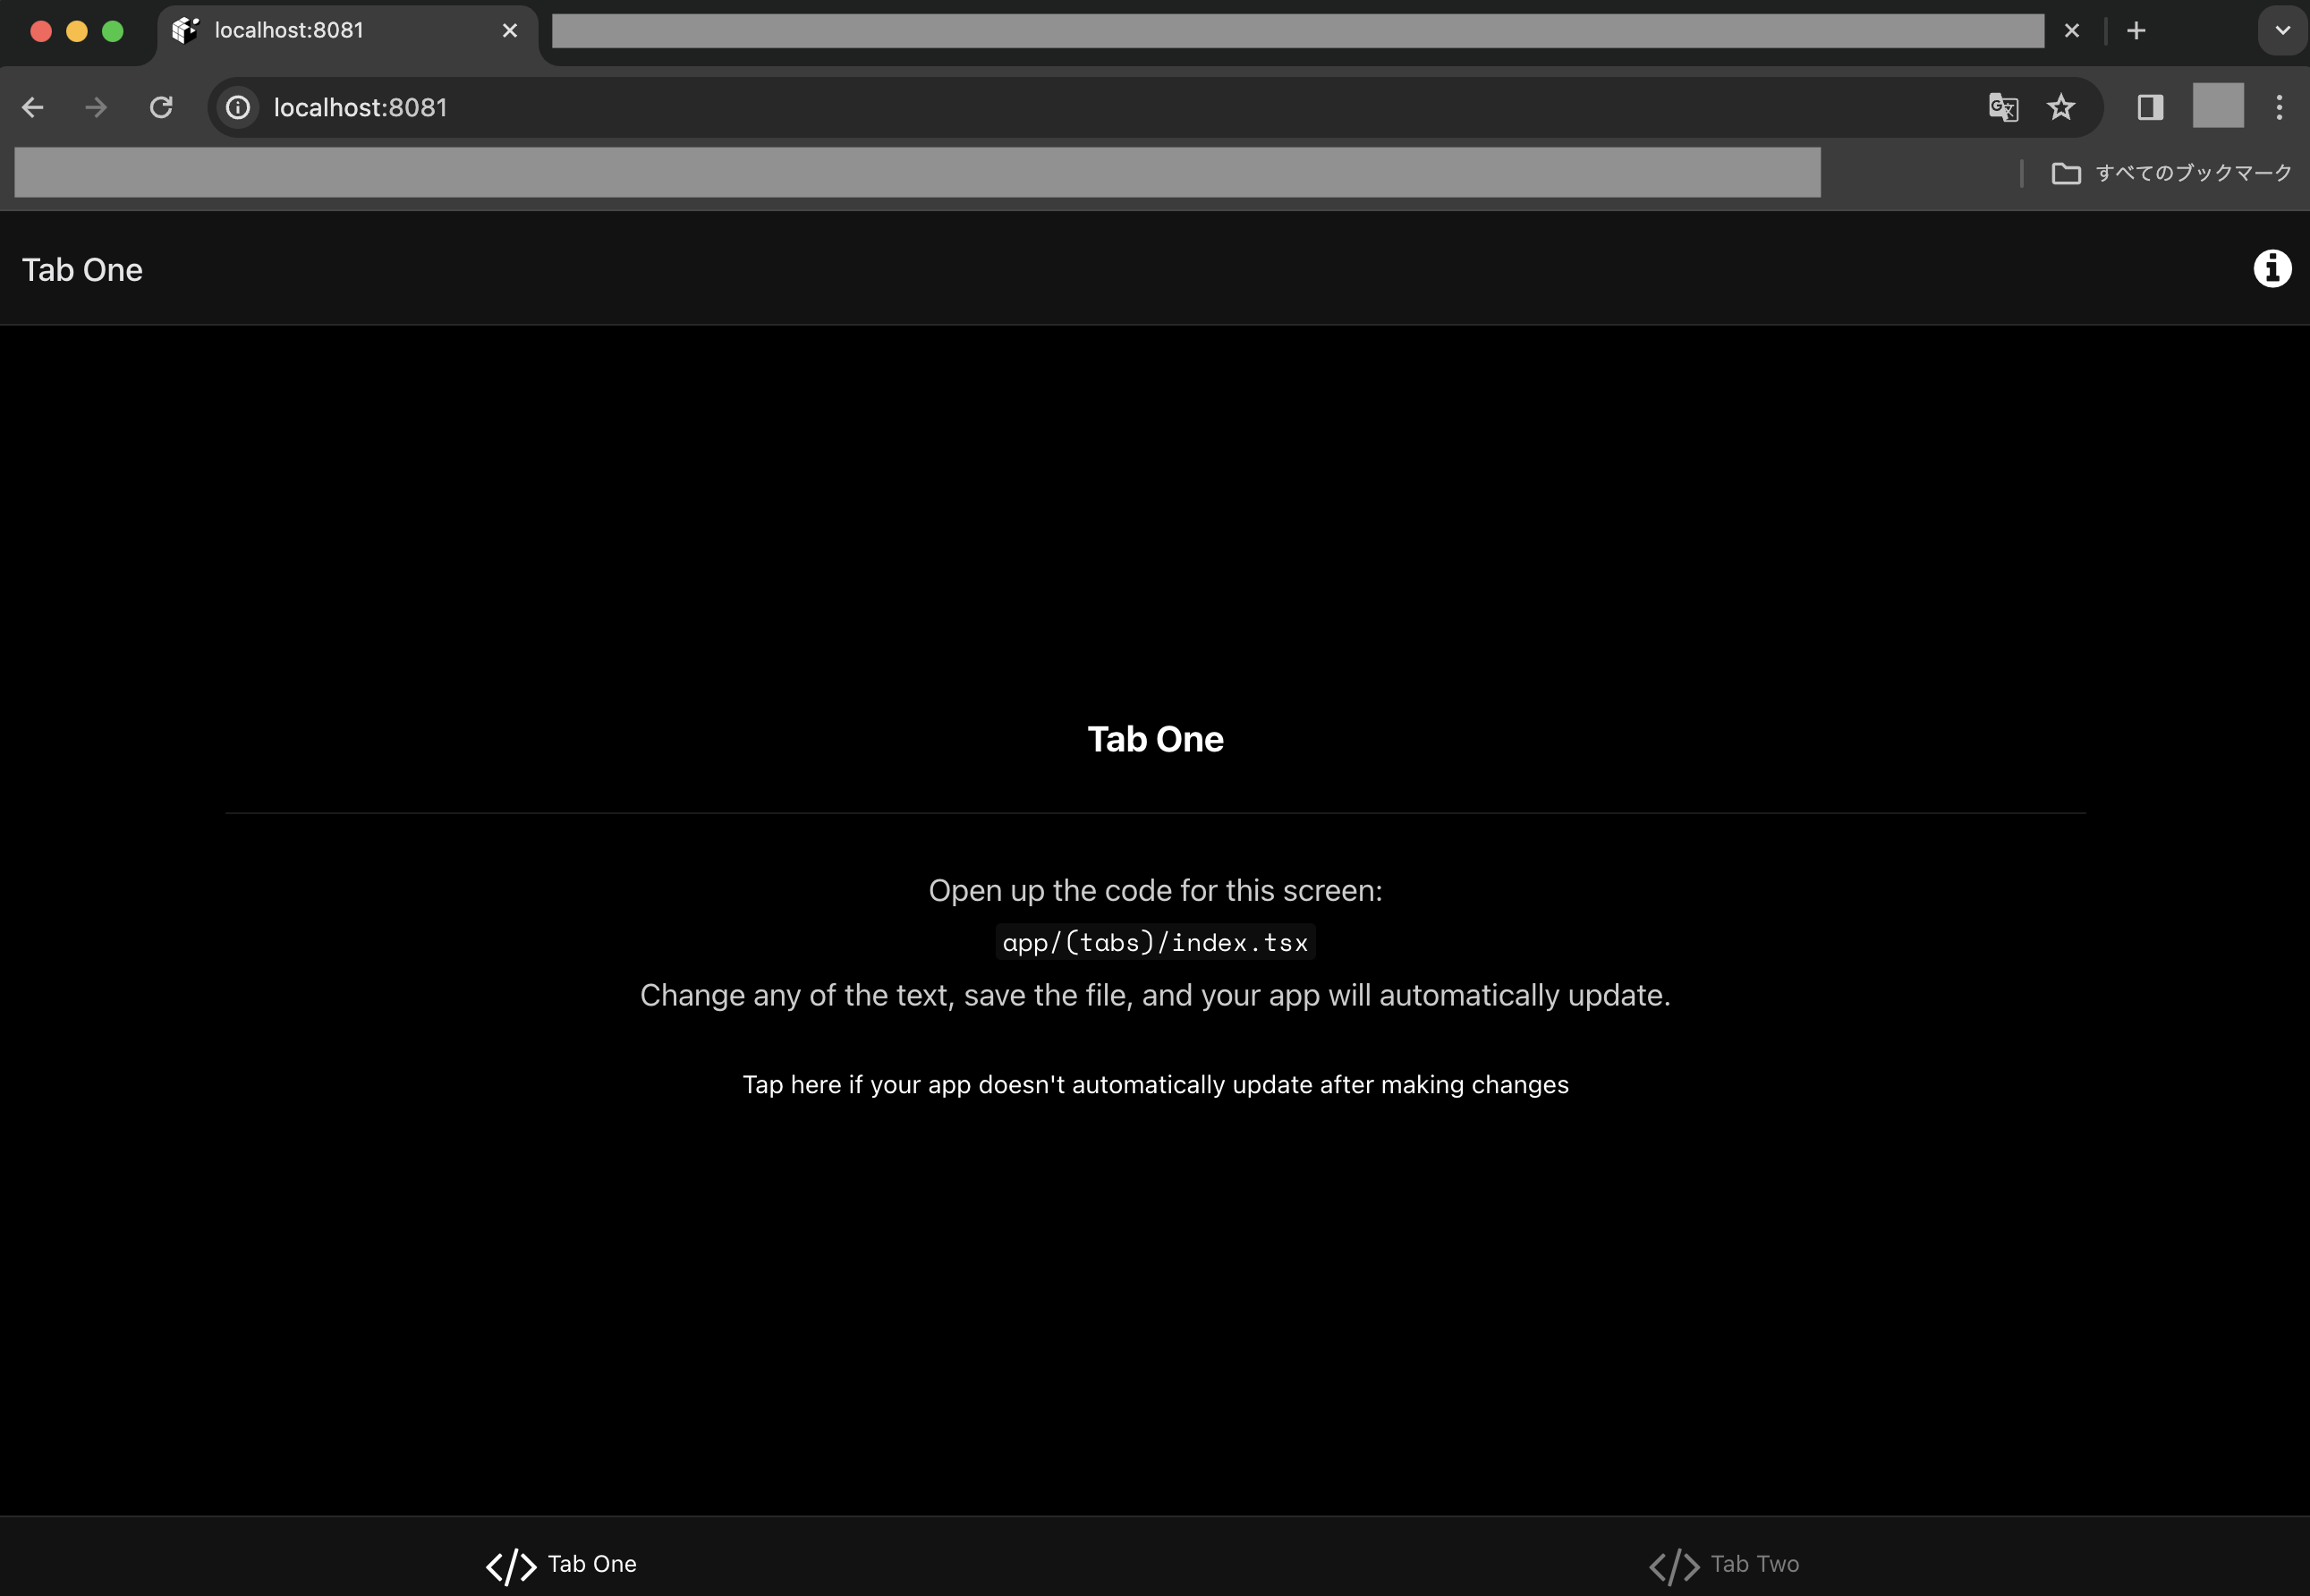
また、ブラウザから「http://localhost:8081」にアクセスすると、ブラウザで確認することも可能です。
※Web版に関してはライブラリ「react-native-web」で実現しているため、基本的にはアプリの方で確認するのがおすすめだと思います。
初期ファイルを整理してHello Worldを試す
次に初期ファイルを少し整理し、画面に「Hello World !!」だけを出力させてみます。
まずはappディレクトリ直下にあるディレクトリ「(tabs)」を削除し、新しくファイル「index.tsx」を新規作成します。
そしてファイル「index.tsx」の中身は以下のようにします。
import { View, Text } from 'react-native'

export default function Index() {
    return (
        <View>
            <Text>
                Hello World !!
            </Text>
        </View>
    );
};
加えて、「app/_layout.tsx」の関数「RootLayoutNav」部分と、「tsconfig.json」の「include」部分もそれぞれ以下のように修正しておきます。
・・・

function RootLayoutNav() {
    const colorScheme = useColorScheme();

    return (
        <ThemeProvider value={colorScheme === 'dark' ? DarkTheme : DefaultTheme}>
            <Stack>
                <Stack.Screen name='index' options={{ title: '' }} />
            </Stack>
        </ThemeProvider>
    );
}
・・・

  "include": [
    "**/**/*.ts",
    "**/**/*.tsx",
    ".expo/types/**/*.ts",
    "expo-env.d.ts"
  ]
}
次にサーバーを再起動させてExpo Goで確認し、以下のように表示されればOKです。

Firebase Authenticationと連携してログイン機能を付ける
次はFirebase Authenticationと連携してログイン関連機能を付けてみます。
ここではFirebase Authenticationの詳細は割愛しますが、アカウントの作成などがまだの方は以下の関連記事にある「Firebase Authenticationによるログイン関連機能の実装方法」の部分で解説しているので、ぜひ参考に準備をしてみて下さい。
関連記事👇

では一度サーバーを止めた後、以下のコマンドを実行し、Firebase関連のライブラリをインストールします。
$ npm i firebase@10.6.0
$ npm i @react-native-async-storage/async-storage
※24年2月時点では少し古いバージョン「10.6.0」じゃないと上手く動作しなかったので、このバージョンを使います。Expo(React Native)で各種ライブラリを導入する際は、バージョン指定が大事になりそうです。また、Firebaseのインスタンスの保存先としてasync-storageも必要になったようなので、合わせてインストールしています。
次にファイル「tsconfig.json」のcompilerOptionsのpathsに「@firebase/auth」のパスを追加します。
{
    "extends": "expo/tsconfig.base",
    "compilerOptions": {
        "strict": true,
        "paths": {
            "@/*": [
                "./*"
            ],
            "@firebase/auth": ["./node_modules/@firebase/auth/dist/index.rn.d.ts"],
        }
    },
    "include": [
        "**/**/*.ts",
        "**/**/*.tsx",
        ".expo/types/**/*.ts",
        "expo-env.d.ts"
    ]
}
※これをすると後述の「getReactNativePersistence」を読み込む際にVSCodeのエラーを回避できます。
次に以下のコマンドを実行し、Firebasek関連ファイルを作成します。
$ touch .env
$ mkdir libs
$ mkdir hooks
$ mkdir contexts
$ cd libs
$ touch firebaseConfig.ts
$ cd ../hooks
$ touch useFirebaseAuth.ts
$ cd ../contexts
$ touch AuthContext.tsx
$ cd ..
次に作成した各種ファイルの中身をそれぞれ次のように記述します。
EXPO_PUBLIC_FIREBASE_API_KEY="Firebaseから取得した接続情報"
EXPO_PUBLIC_FIREBASE_AUTH_DOMAIN="Firebaseから取得した接続情報"
EXPO_PUBLIC_FIREBASE_PROJECT_ID="Firebaseから取得した接続情報"
EXPO_PUBLIC_FIREBASE_STORAGE_BUCKET="Firebaseから取得した接続情報"
EXPO_PUBLIC_FIREBASE_MESSEGING_SENDER_ID="Firebaseから取得した接続情報"
EXPO_PUBLIC_FIREBASE_APP_ID="Firebaseから取得した接続情報"
/* Firebaseの初期設定ファイル */

import { initializeApp, getApps, getApp } from "firebase/app"
import { getAuth, initializeAuth, getReactNativePersistence } from "firebase/auth"
import { Platform } from 'react-native'
// Firebaseの認証情報を設定
const firebaseConfig = {
    apiKey: process.env.EXPO_PUBLIC_FIREBASE_API_KEY,
    authDomain: process.env.EXPO_PUBLIC_FIREBASE_AUTH_DOMAIN,
    projectId: process.env.EXPO_PUBLIC_FIREBASE_PROJECT_ID,
    storageBucket: process.env.EXPO_PUBLIC_FIREBASE_STORAGE_BUCKET,
    messagingSenderId: process.env.EXPO_PUBLIC_FIREBASE_MESSEGING_SENDER_ID,
    appId: process.env.EXPO_PUBLIC_FIREBASE_APP_ID,
};

// Firebaseの初期化&Appオブジェクトの作成
export const auth = Platform.OS === 'web'
                        ? getAuth(app)
                        : initializeAuth(app, {
                              persistence: getReactNativePersistence(ReactNativeAsyncStorage)
                          });
※authを作成する際は、プラットフォーム別に定義するようにしないとWebの場合にエラーがでます。
/* FirebaseAuthの状態管理用フック */
import { useState, useEffect } from 'react'
import { auth } from '../libs/firebaseConfig'
import {
    User,
    onAuthStateChanged,
    createUserWithEmailAndPassword,
    signInWithEmailAndPassword,
    signOut,
    deleteUser,
} from 'firebase/auth'
import { useRouter } from 'expo-router'

// useFirebaseAuth関数
export default function useFirebaseAuth() {
    const [firebaseUser, setFirebaseUser] = useState<User | null>(null);
    const [loading, setLoading] = useState(true);
    const router = useRouter();

    // Signup関数
    const signupWithEmail = async (args: {
        email: string,
        password: string,
    }): Promise<void> => {
        setLoading(true);

        let createUser;
        try {
            const credential = await createUserWithEmailAndPassword(auth, args.email, args.password);
            createUser = credential.user;

            setLoading(false);
            router.push('/');
            return;

        } catch (error) {
            if (error instanceof Error) {
                console.error(error.message);
            };

            if (createUser) {
                deleteUser(createUser);
            };

            console.log("Signup処理ができませんでした。");
            setLoading(false);
            return;

           throw error;
        }
    };

    // Login関数
    const loginWithEmail = async (args: {
        email: string,
        password: string,
    }): Promise<void> => {
        setLoading(true);

        try {
            const credential = await signInWithEmailAndPassword(auth, args.email, args.password);

            setLoading(false);
            router.push('/');
            return;

        } catch (error) {
            if (error instanceof Error) {
                console.error(error.message);
            }

            console.log("Loginできませんでした。");
            setLoading(false);
            return;

            throw error;
        }
    };

    // Logout関数
    const logout = async (): Promise<void> => {
        setLoading(true);

        if (!firebaseUser) {
            setLoading(false);
            return;
        };

        try {
            await signOut(auth);
            setFirebaseUser(null);

            setLoading(false);
            router.push('/');
            return;

        } catch (error) {
            if (error instanceof Error) {
                console.error(error.message);
            }

            console.log("ログアウトに失敗しました。");
            setLoading(false);
            return;

            throw error;
        }
    };

    // 退会用関数
    const destroyUser = async (): Promise<void> => {
        setLoading(true);

        if (!firebaseUser) {
            setLoading(false);
            return;
        };

        try {
            // Firebaseのユーザー削除
            await deleteUser(firebaseUser);

            // ログアウト処理
            await logout();

            setLoading(false);
            router.push('/');
            return;

        } catch (error) {
            if (error instanceof Error) {
                console.error(error.message);
            }

            setLoading(false);
            return;

            throw error;
        };
    };

    // onAuthStateChanged関数における、
    // ユーザーの状態管理用パラメータの設定
    const nextOrObserver = async (user: User | null): Promise<void> => {
        setLoading(true);

        if (!user) {
            setLoading(false);
            return;
        }

        setFirebaseUser(user);

        setLoading(false);
        return;
    };

    useEffect(() => {
        const unsubscribe = onAuthStateChanged(auth, nextOrObserver);
        return unsubscribe;
    }, []);

    return {
        firebaseUser,
        loading,
        signupWithEmail,
        loginWithEmail,
        logout,
        destroyUser,
    };
};
/* ユーザー情報共有用のコンテキスト */
import { ReactNode, createContext, useContext } from 'react'
import useFirebaseAuth from '../hooks/useFirebaseAuth'
import { User } from 'firebase/auth'

// AuthContextのインターフェース定義
interface AuthContext {
    firebaseUser: User | null;
    loading: boolean;
    signupWithEmail: (args: {
        email: string,
        password: string
    }) => Promise<void>;
    loginWithEmail: (args: {
        email: string,
        password: string
    }) => Promise<void>;
    logout: () => Promise<void>;
    destroyUser: () => Promise<void>;
};

type AuthProviderProps = {
    children: ReactNode;
};

// ユーザー情報共有用のコンテキスト「AuthCtx」を作成
export const AuthCtx = createContext({} as AuthContext);

// ユーザー情報共有用のコンポーネント
export function AuthContextProvider({ children }: AuthProviderProps) {
    // FirebaseAuthの状態を取得
    const {
        firebaseUser,
        loading,
        signupWithEmail,
        loginWithEmail,
        logout,
        destroyUser,
    } = useFirebaseAuth();

    // AuthContextオブジェクトの定義
    const AuthContext: AuthContext = {
        firebaseUser: firebaseUser,
        loading: loading,
        signupWithEmail: signupWithEmail,
        loginWithEmail: loginWithEmail,
        logout: logout,
        destroyUser: destroyUser,
    };

    return <AuthCtx.Provider value={AuthContext}>{children}</AuthCtx.Provider>;
}

// ユーザー情報共有用の関数
export const useAuthContext = () => useContext(AuthCtx);
次に以下のコマンドを実行し、indexファイルの移動や、ログイン関連に関する画面の各種ファイルを作成します。
$ mkdir (top)
$ mkdir (auth)
$ mv index.tsx app/\(top\)/
$ cd (top)
$ touch _layout.tsx
$ cd ../(auth)
$ touch signup.tsx
$ touch login.tsx
$ touch _layout.tsx
$ cd ../components
$ mkdir Footer
$ cd Footer
$ touch Footer.tsx
$ cd ../..
次に作成した各種ファイルの中身をそれぞれ次のように記述します。
import { View, Text, StyleSheet } from 'react-native'
import { useAuthContext } from '../../contexts/AuthContext'

export default function Index() {
    const { firebaseUser } = useAuthContext();

    const styles = StyleSheet.create({
        container: {
            width: '100%',
            flex: 1,
            alignItems: 'center',
            backgroundColor: '#FFFFFF',
        },
        titleContainer: {
            justifyContent: 'center',
            marginTop: 30,
            marginBottom: 30,
        },
        titleText: {
            fontSize: 24,
            fontWeight: 'bold',
        },
        loginCheckContainer: {
            width: '100%',
            alignItems: 'center',
        },
        loginCheckTitle: {
            marginBottom: 10,
        },
        loginCheckTitleText: {
            fontSize: 16,
        },
    });

    return (
        <View style={styles.container}>
            <View style={styles.titleContainer}>
                <Text style={styles.titleText}>
                    TOPページ
                </Text>
            </View>
            <View style={styles.loginCheckContainer}>
                <View style={styles.loginCheckTitle}>
                    <Text style={styles.loginCheckTitleText}>
                        ログイン状況
                    </Text>
                </View>
                <View>
                    <Text>
                        ステータス:{firebaseUser ? "ログイン済み" : "未ログイン"}
                    </Text>
                    { firebaseUser &&
                        <View>
                            <Text>
                                uid: { firebaseUser.uid }
                            </Text>
                            <Text>
                                email: { firebaseUser.email }
                            </Text>
                            <Text>
                                emailVerified: { String(firebaseUser?.emailVerified) }
                            </Text>
                        </View>
                    }
                </View>
            </View>
        </View>
    );
};
import { Tabs } from 'expo-router'

export default function RootLayout() {
    return (
        <Tabs>
            <Tabs.Screen
                name="index"
                options={{
                    title: '',
                    tabBarStyle: {display: 'none'},
                }}
            />
        </Tabs>
    );
};
import { useState } from 'react'
import { View, Text, TextInput, Pressable, PressableStateCallbackType, StyleSheet } from 'react-native'
import { useAuthContext } from '../../contexts/AuthContext'

export default function Signup() {
    const { signupWithEmail } = useAuthContext();
    const [email, setEmail] = useState('');
    const [password, setPassword] = useState('');
    const [isHoverd, setIsHoverd] = useState(false);

    const styles = StyleSheet.create({
        container: {
            width: '100%',
            flex: 1,
            alignItems: 'center',
            backgroundColor: '#FFFFFF',
        },
        titleContainer: {
            justifyContent: 'center',
            marginTop: 30,
            marginBottom: 30,
        },
        titleText: {
            fontSize: 24,
            fontWeight: 'bold',
        },
        inputContainer: {
            justifyContent: 'center',
            marginBottom: 20,
        },
        inputItem: {
            width: 250,
            marginBottom: 20,
        },
        inputItemLabel: {
            fontSize: 16,
            fontWeight: 'bold',
        },
        inputItemText: {
            fontSize: 16,
            borderWidth: 1,
            borderColor: 'gray',
            borderRadius: 5,
            padding: 5,
        },
        pressableContainer: {
            width: 100,
            backgroundColor: '#00a968',
            borderRadius: 5,
            opacity: isHoverd ? 0.6 : 1,
        },
        pressableContainerPress: {
            width: 100,
            backgroundColor: '#119864',
            borderRadius: 5,
            opacity: isHoverd ? 0.6 : 1,
        },
        pressableItem: {
            margin: 5,
        },
        pressableItemText: {
            textAlign: 'center',
            color: 'white',
            fontWeight: 'bold',
        },
    });

    const submit = async () => {
        await signupWithEmail({email: email, password: password});
    };

    return (
        <View style={styles.container}>
            <View style={styles.titleContainer}>
                <Text style={styles.titleText}>
                    サインアップページ
                </Text>
            </View>
            <View style={styles.inputContainer}>
                <View style={styles.inputItem}>
                    <Text style={styles.inputItemLabel}>
                        メールアドレス
                    </Text>
                    <TextInput
                        style={styles.inputItemText}
                        onChangeText={setEmail}
                        value={email}
                        placeholder="xxxx@example.com"
                        placeholderTextColor={'gray'}
                    />
                </View>
                <View style={styles.inputItem}>
                    <Text style={styles.inputItemLabel}>
                        パスワード
                    </Text>
                    <TextInput
                        style={styles.inputItemText}
                        onChangeText={setPassword}
                        value={password}
                    />
                </View>
            </View>
            <Pressable
                style={({ pressed } : PressableStateCallbackType) => [
                    pressed
                        ? styles.pressableContainerPress
                        : styles.pressableContainer
                ]}
                onHoverIn={() => setIsHoverd(true) }
                onHoverOut={() => setIsHoverd(false) }
                onPress={() => submit() }
            >
                <View style={styles.pressableItem}>
                    <Text style={styles.pressableItemText}>
                        登録
                    </Text>
                </View>
            </Pressable>
        </View>
    );
};
import { useState } from 'react'
import { View, Text, TextInput, Pressable, PressableStateCallbackType, StyleSheet } from 'react-native'
import { useAuthContext } from '../../contexts/AuthContext'

export default function Login() {
    const { loginWithEmail } = useAuthContext();
    const [email, setEmail] = useState('');
    const [password, setPassword] = useState('');
    const [isHoverd, setIsHoverd] = useState(false);

    const styles = StyleSheet.create({
        container: {
            width: '100%',
            flex: 1,
            alignItems: 'center',
            backgroundColor: '#FFFFFF',
        },
        titleContainer: {
            justifyContent: 'center',
            marginTop: 30,
            marginBottom: 30,
        },
        titleText: {
            fontSize: 24,
            fontWeight: 'bold',
        },
        inputContainer: {
            justifyContent: 'center',
            marginBottom: 20,
        },
        inputItem: {
            width: 250,
            marginBottom: 20,
        },
        inputItemLabel: {
            fontSize: 16,
            fontWeight: 'bold',
        },
        inputItemText: {
            fontSize: 16,
            borderWidth: 1,
            borderColor: 'gray',
            borderRadius: 5,
            padding: 5,
        },
        pressableContainer: {
            width: 100,
            backgroundColor: '#00a968',
            borderRadius: 5,
            opacity: isHoverd ? 0.6 : 1,
        },
        pressableContainerPress: {
            width: 100,
            backgroundColor: '#119864',
            borderRadius: 5,
            opacity: isHoverd ? 0.6 : 1,
        },
        pressableItem: {
            margin: 5,
        },
        pressableItemText: {
            textAlign: 'center',
            color: 'white',
            fontWeight: 'bold',
        },
    });

    const submit = async () => {
        await loginWithEmail({email: email, password: password});
    };

    return (
        <View style={styles.container}>
            <View style={styles.titleContainer}>
                <Text style={styles.titleText}>
                    ログインページ
                </Text>
            </View>
            <View style={styles.inputContainer}>
                <View style={styles.inputItem}>
                    <Text style={styles.inputItemLabel}>
                        メールアドレス
                    </Text>
                    <TextInput
                        style={styles.inputItemText}
                        onChangeText={setEmail}
                        value={email}
                        placeholder="xxxx@example.com"
                        placeholderTextColor={'gray'}
                    />
                </View>
                <View style={styles.inputItem}>
                    <Text style={styles.inputItemLabel}>
                        パスワード
                    </Text>
                    <TextInput
                        style={styles.inputItemText}
                        onChangeText={setPassword}
                        value={password}
                    />
                </View>
            </View>
            <Pressable
                style={({ pressed } : PressableStateCallbackType) => [
                    pressed
                        ? styles.pressableContainerPress
                        : styles.pressableContainer
                ]}
                onHoverIn={() => setIsHoverd(true) }
                onHoverOut={() => setIsHoverd(false) }
                onPress={() => submit() }
            >
                <View style={styles.pressableItem}>
                    <Text style={styles.pressableItemText}>
                        ログイン
                    </Text>
                </View>
            </Pressable>
        </View>
    );
};
import { Tabs } from 'expo-router';

export default function RootLayout() {
    return (
        <Tabs>
            <Tabs.Screen
                name="signup"
                options={{
                    title: '',
                    tabBarStyle: {display: 'none'},
                }}
            />
            <Tabs.Screen
                name="login"
                options={{
                    title: '',
                    tabBarStyle: {display: 'none'},
                }}
            />
        </Tabs>
    );
};
import { useState } from 'react'
import { useRouter } from 'expo-router'
import { useAuthContext } from '../../contexts/AuthContext'
import { View, Text, Pressable, PressableStateCallbackType, StyleSheet } from 'react-native'

export default function Footer() {
    const { firebaseUser, logout } = useAuthContext();
    const [isHoverdSignup, setIsHoverdSignup] = useState(false);
    const [isHoverdLogin, setIsHoverdLogin] = useState(false);
    const [isHoverdLogout, setIsHoverdLogout] = useState(false);
    const router = useRouter();

    const styles = StyleSheet.create({
        container: {
            width: '100%',
            height: 50,
            backgroundColor: '#00a968',
        },
        pressableContainer: {
            width: '100%',
            height: 50,
            flexDirection: 'row',
        },
        pressableSignup: {
            width: '50%',
            borderRightWidth: 0.5,
            borderRightColor: '#FBFBFB',
            alignItems: 'center',
            justifyContent: 'center',
            backgroundColor: isHoverdSignup ? "#119864" : '#00a968',
        },
        pressableLogin: {
            width: '50%',
            borderRightWidth: 0.5,
            borderRightColor: '#FBFBFB',
            alignItems: 'center',
            justifyContent: 'center',
            backgroundColor: isHoverdLogin ? "#119864" : '#00a968',
        },
        pressablePress: {
            width: '50%',
            borderRightWidth: 0.5,
            borderRightColor: '#FBFBFB',
            alignItems: 'center',
            justifyContent: 'center',
            backgroundColor: "#119864",
        },
        pressableText: {
            color: 'white',
            fontSize: 16,
        },
        pressableLogoutContainer: {
            width: '100%',
            height: 50,
            flexDirection: 'row',
        },
        pressableLogout: {
            flex: 1,
            alignItems: 'center',
            justifyContent: 'center',
            backgroundColor: isHoverdLogout ? "gray" : 'dimgray',
        },
        pressablePressLogout: {
            flex: 1,
            alignItems: 'center',
            justifyContent: 'center',
            backgroundColor: "#119864",
        },
        pressableLogoutText: {
            color: 'white',
            fontSize: 16,
        },
    });

    const pressTab = (path: any) => {
        router.push(path);
    };

    const pressLogout = async () => {
        await logout();
    };

    return (
        <View style={styles.container}>
            { !firebaseUser &&
                <View style={styles.pressableContainer}>
                    <Pressable
                        style={({ pressed } : PressableStateCallbackType) => [
                            pressed
                                ? styles.pressablePress
                                : styles.pressableSignup
                        ]}
                        onHoverIn={() => setIsHoverdSignup(true)}
                        onHoverOut={() => setIsHoverdSignup(false)}
                        onPress={() => pressTab('(auth)/signup')}
                    >
                        <Text style={styles.pressableText}>
                            サインアップ
                        </Text>
                    </Pressable>
                    <Pressable
                        style={({ pressed } : PressableStateCallbackType) => [
                            pressed
                                ? styles.pressablePress
                                : styles.pressableLogin
                        ]}
                        onHoverIn={() => setIsHoverdLogin(true)}
                        onHoverOut={() => setIsHoverdLogin(false)}
                        onPress={() => pressTab('(auth)/login')}
                    >
                        <Text style={styles.pressableText}>
                            ログイン
                        </Text>
                    </Pressable>
                </View>
            }
            { firebaseUser &&
                <View style={styles.pressableLogoutContainer}>
                    <Pressable
                        style={({ pressed } : PressableStateCallbackType) => [
                            pressed
                                ? styles.pressablePressLogout
                                : styles.pressableLogout
                        ]}
                        onHoverIn={() => setIsHoverdLogout(true)}
                        onHoverOut={() => setIsHoverdLogout(false)}
                        onPress={() => logout()}
                    >
                        <Text style={styles.pressableLogoutText}>
                            ログアウト
                        </Text>
                    </Pressable>
                </View>
            }
        </View>
    );
};
次に「app/_layout.tsx」を以下のように修正します。
・・・

import { AuthContextProvider } from '../contexts/AuthContext';
import Footer from '@/components/Footer/Footer';

・・・
function RootLayoutNav() {
    const colorScheme = useColorScheme();

    return (
        <ThemeProvider value={colorScheme === 'dark' ? DarkTheme : DefaultTheme}>
            <AuthContextProvider>
                <Stack>
                    <Stack.Screen name="(top)" options={{ headerShown: false }} />
                    <Stack.Screen name="(auth)" options={{ headerShown: false }} />
                </Stack>
                <Footer />
            </AuthContextProvider>
        </ThemeProvider>
    );
}
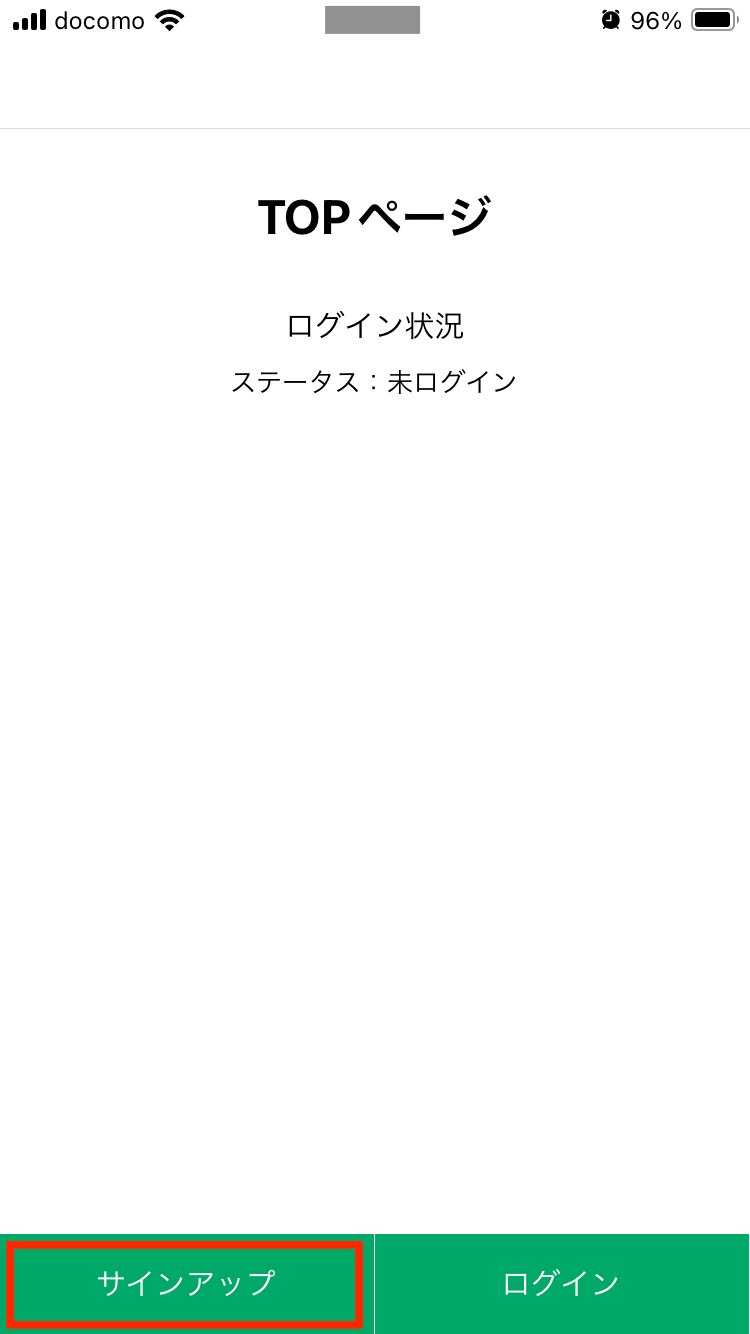
次にサーバーを再起動してExpo Goで確認してみて下さい。
次のような画面が表示されるので、「サインアップ」をタップします。
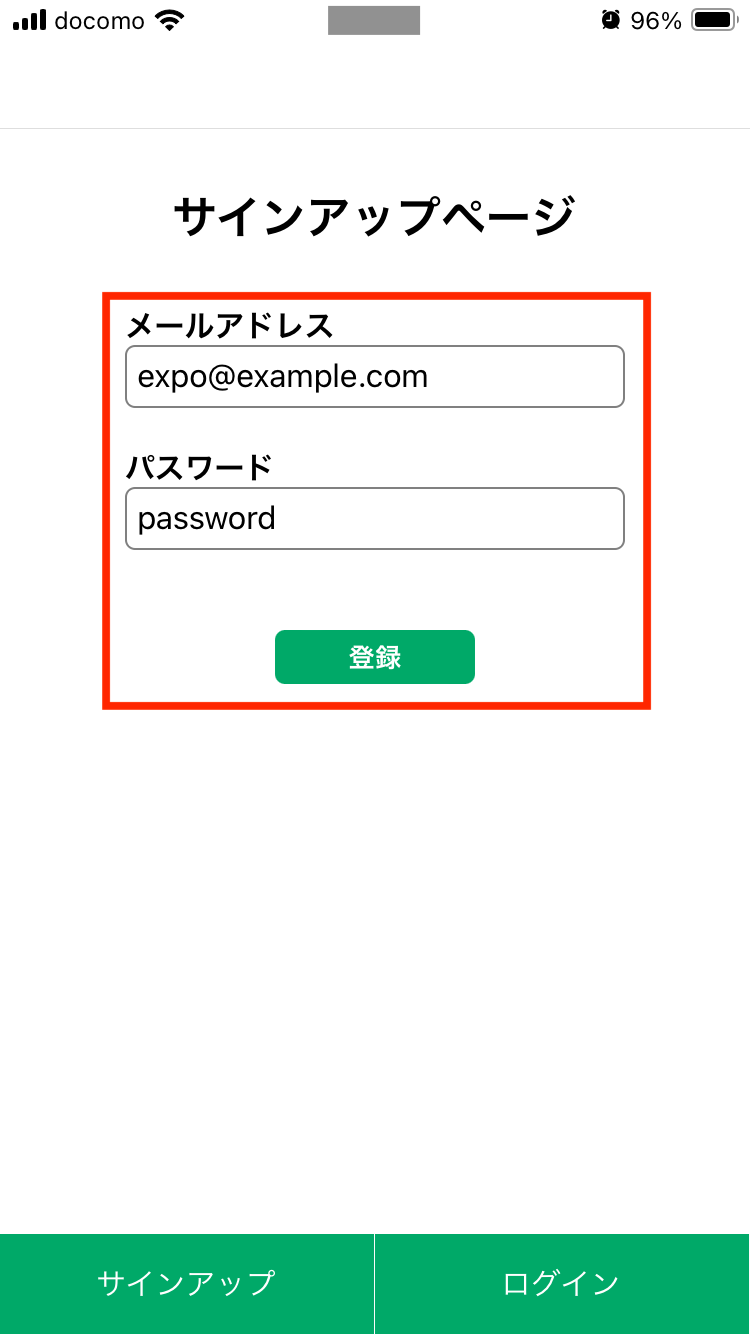
サインアップページが開くので、メールアドレスとパスワードを入力後、「登録」をタップします。
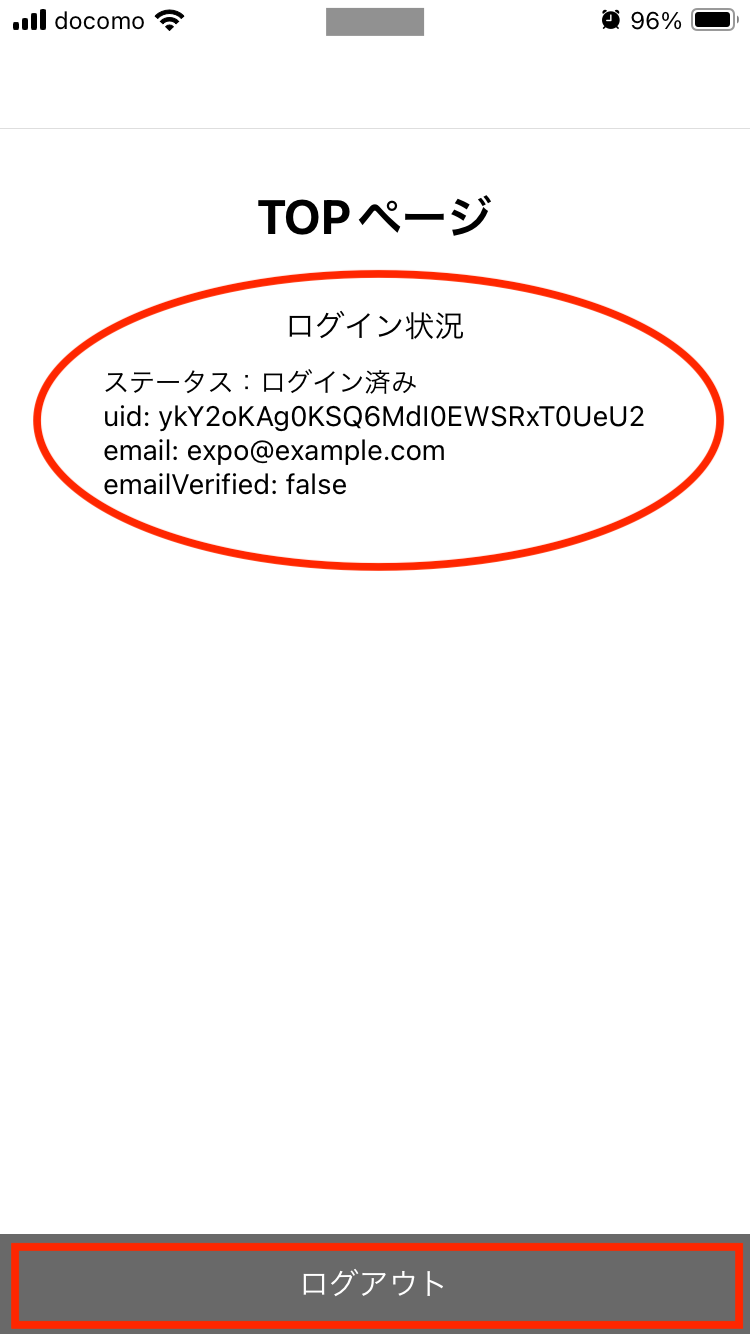
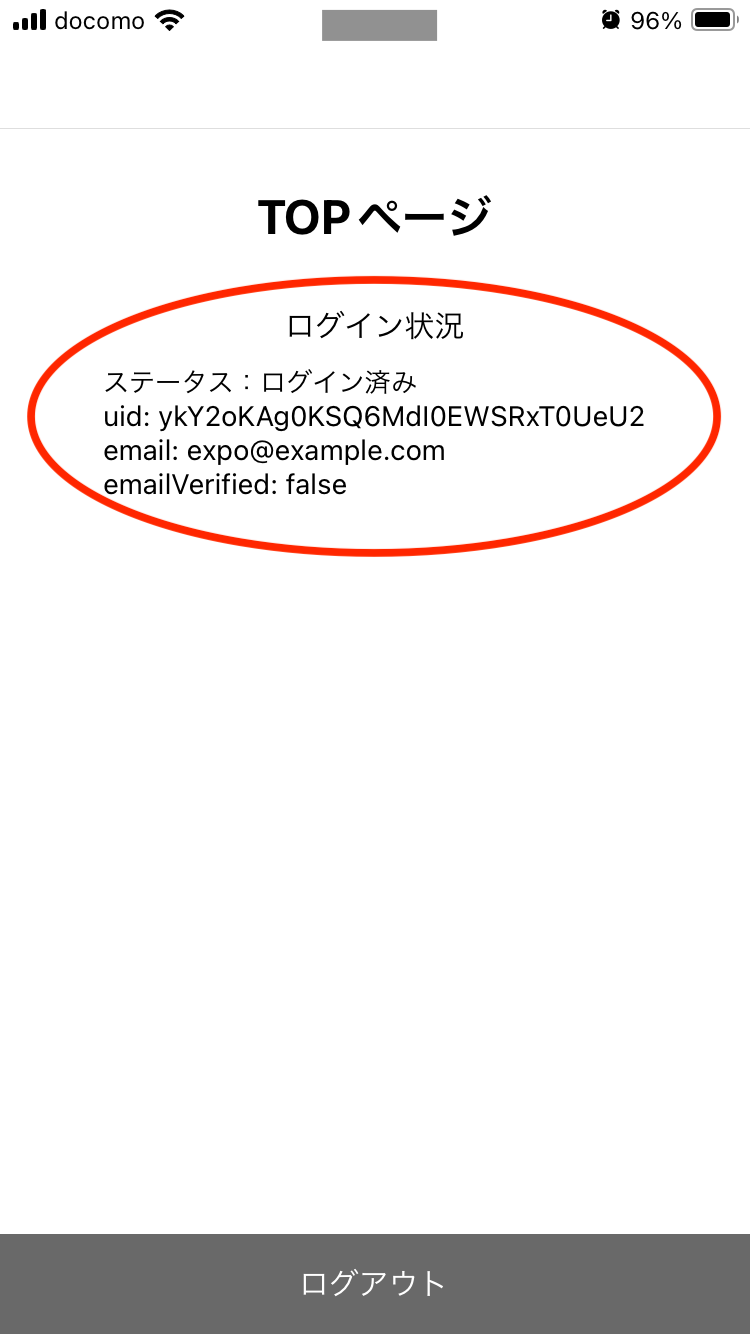
TOPページに画面遷移し、ログイン済みになっていればOKです。
続けて「ログアウト」をタップします。
ログアウトされるので、次は「ログイン」をタップします。
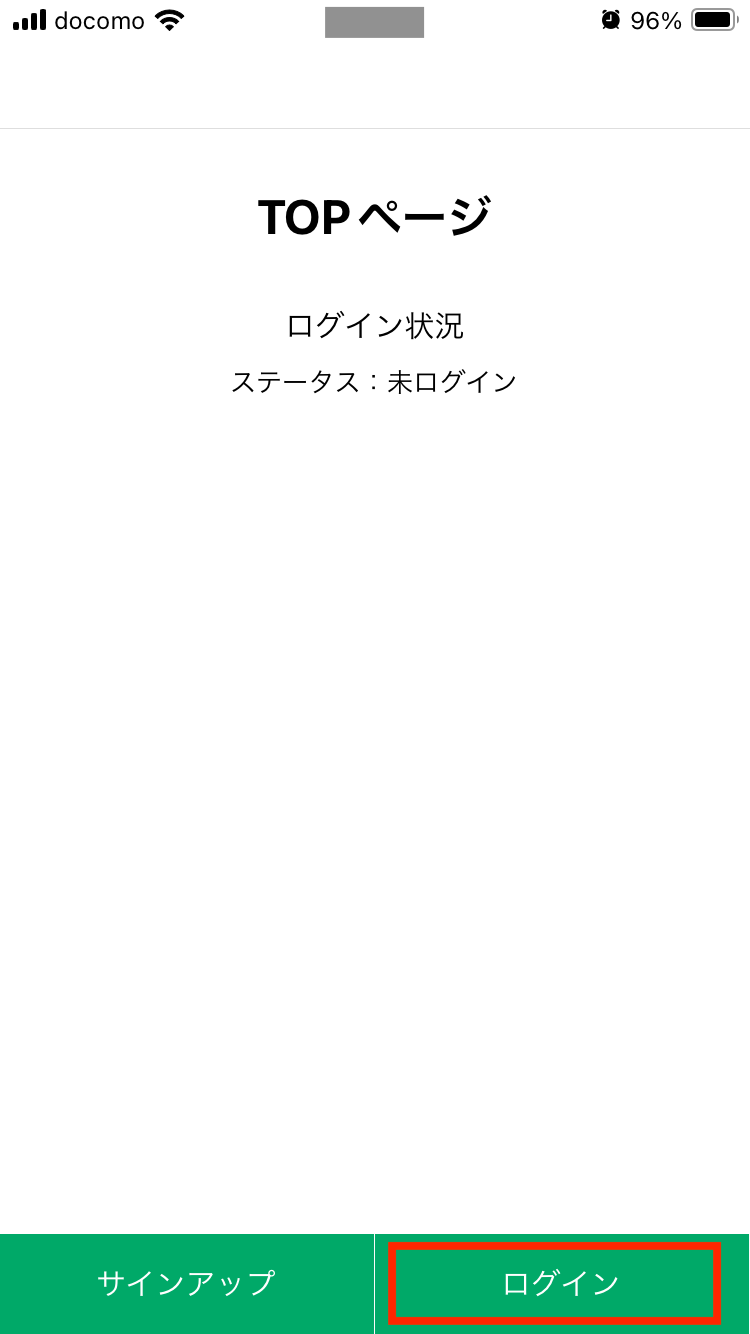
先ほどサインアップページで登録したメールアドレスとパスワードを入力し、「ログイン」をタップします。
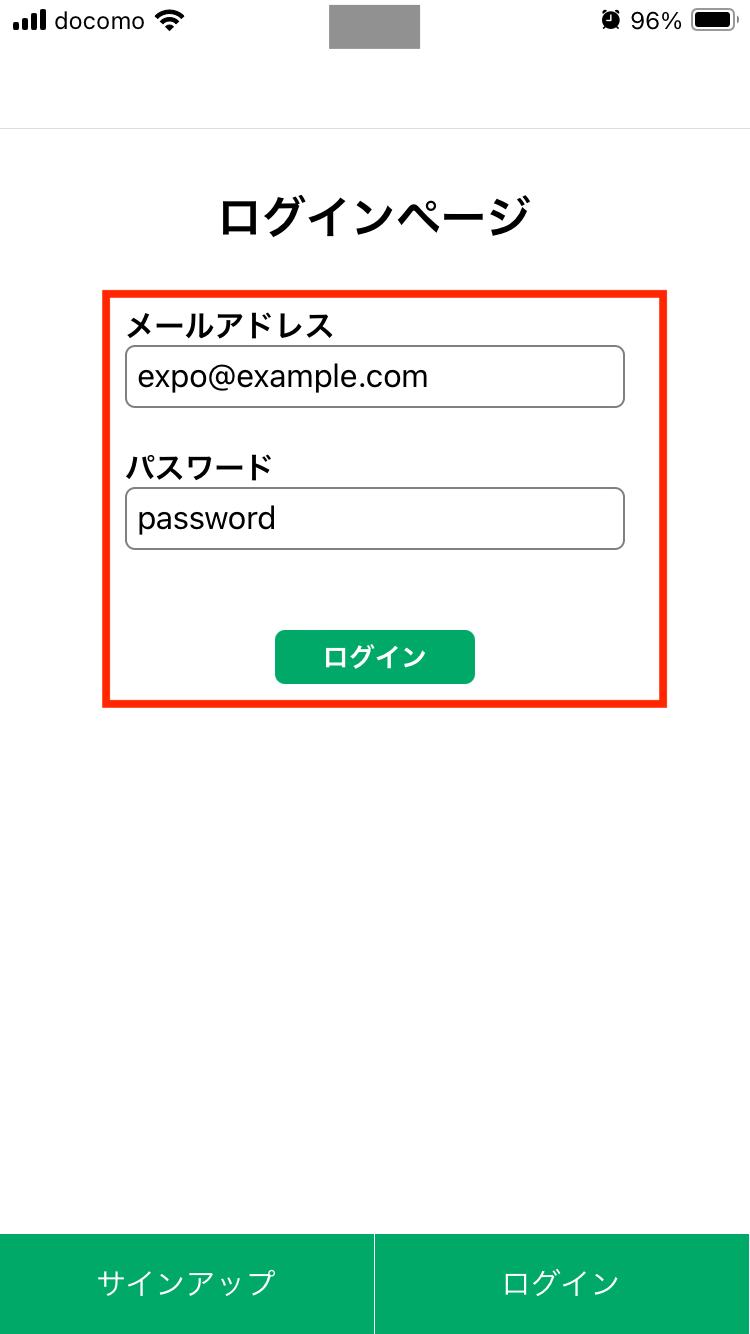
TOPページに画面遷移し、ログイン済みになっていればOKです。
yupとreact-hook-formでサインアップページにバリデーション機能を付ける
次にサインアップページにある入力フォームにバリデーションチェックの機能を付けてみます。
まずは以下のコマンドを実行し、バリデーションチェックに使うyupとreact-hook-form関連のライブラリをインストールします。
$ npm i react-hook-form @hookform/resolvers yup
次にサインアップページのファイル「(auth)/signup.tsx」を次のように修正します。
import { useState } from 'react'
import { View, Text, TextInput, Pressable, PressableStateCallbackType, StyleSheet } from 'react-native'
import { useAuthContext } from '../../contexts/AuthContext'
import * as Yup from 'yup'
import { yupResolver } from '@hookform/resolvers/yup'
import { useForm, SubmitHandler, SubmitErrorHandler, Controller } from 'react-hook-form'

type FormData = {
    email: string,
    password: string,
};

export default function Signup() {
    const { signupWithEmail } = useAuthContext();
    const [email, setEmail] = useState('');
    const [password, setPassword] = useState('');
    const [isHoverd, setIsHoverd] = useState(false);

    const styles = StyleSheet.create({
        container: {
            width: '100%',
            flex: 1,
            alignItems: 'center',
            backgroundColor: '#FFFFFF',
        },
        titleContainer: {
            justifyContent: 'center',
            marginTop: 30,
            marginBottom: 30,
        },
        titleText: {
            fontSize: 24,
            fontWeight: 'bold',
        },
        inputContainer: {
            justifyContent: 'center',
            marginBottom: 20,
        },
        inputItem: {
            width: 250,
            marginBottom: 20,
        },
        inputItemLabel: {
            fontSize: 16,
            fontWeight: 'bold',
        },
        inputItemText: {
            fontSize: 16,
            borderWidth: 1,
            borderColor: 'gray',
            borderRadius: 5,
            padding: 5,
        },
        pressableContainer: {
            width: 100,
            backgroundColor: '#00a968',
            borderRadius: 5,
            opacity: isHoverd ? 0.6 : 1,
        },
        pressableContainerPress: {
            width: 100,
            backgroundColor: '#119864',
            borderRadius: 5,
            opacity: isHoverd ? 0.6 : 1,
        },
        pressableItem: {
            margin: 5,
        },
        pressableItemText: {
            textAlign: 'center',
            color: 'white',
            fontWeight: 'bold',
        },
        errorText: {
            color: 'red',
        },
    });

    // バリデーションの設定
    const validationSchema = Yup.object().shape({
        email: Yup.string()
                  .required('メールアドレスを入力して下さい。')
                  .email('メールアドレスは有効なアドレス形式で入力して下さい。'),
        password: Yup.string()
                     .required('パスワードを入力して下さい。')
                     .matches(/^[0-9a-zA-Z]+$/, 'パスワードは半角英数字で入力して下さい。')
                     .min(6, 'パスワードは6文字以上で入力して下さい。'),
    });
    const formOptions = { resolver: yupResolver(validationSchema) };
    const {
        control,
        handleSubmit,
        formState: { errors },
        getValues,
    } = useForm(formOptions);

    // バリデーションチェックで正常時
    const onSubmit: SubmitHandler<FormData> = async (
        data: any,
    ) => {
        await signupWithEmail({email: data.email, password: data.password});
    };

    // バリデーションチェックでエラー時
    const onError: SubmitErrorHandler<FormData> = async (
        errors: any
    ) => {
        console.log('バリデーションチェックでエラー');
        console.log(errors);
    };

    const submit = async () => {
        const values = getValues();
        setEmail(values.email);
        setPassword(values.password);
        handleSubmit(onSubmit, onError)()
    };

    return (
        <View style={styles.container}>
            <View style={styles.titleContainer}>
                <Text style={styles.titleText}>
                    サインアップページ
                </Text>
            </View>
            <View style={styles.inputContainer}>
                <View style={styles.inputItem}>
                    <Text style={styles.inputItemLabel}>
                        メールアドレス
                    </Text>
                    <Controller
                        control={control}
                        name={'email'}
                        defaultValue={email}
                        render={({
                            field: { onChange, value, name },
                            formState: { errors },
                        }) => (
                            <View>
                                <TextInput
                                    style={styles.inputItemText}
                                    onChangeText={onChange}
                                    value={value}
                                    placeholder="xxxx@example.com"
                                    placeholderTextColor={'gray'}
                                />
                                { errors[name]?.message && (
                                    <Text style={styles.errorText}>
                                        { String(errors[name]?.message) }
                                    </Text>
                                )}
                            </View>
                        )}
                    />
                </View>
                <View style={styles.inputItem}>
                    <Text style={styles.inputItemLabel}>
                        パスワード
                    </Text>
                    <Controller
                        control={control}
                        name={'password'}
                        defaultValue={password}
                        render={({
                            field: { onChange, value, name },
                            formState: { errors },
                        }) => (
                            <View>
                                <TextInput
                                    style={styles.inputItemText}
                                    onChangeText={onChange}
                                    value={value}
                                />
                                { errors[name]?.message && (
                                    <Text style={styles.errorText}>
                                        { String(errors[name]?.message) }
                                    </Text>
                                )}
                            </View>
                        )}
                    />
                </View>
            </View>
            <Pressable
                style={({ pressed } : PressableStateCallbackType) => [
                    pressed
                        ? styles.pressableContainerPress
                        : styles.pressableContainer
                ]}
                onHoverIn={() => setIsHoverd(true) }
                onHoverOut={() => setIsHoverd(false) }
                onPress={() => submit()}
            >
                <View style={styles.pressableItem}>
                    <Text style={styles.pressableItemText}>
                        登録
                    </Text>
                </View>
            </Pressable>
        </View>
    );
};
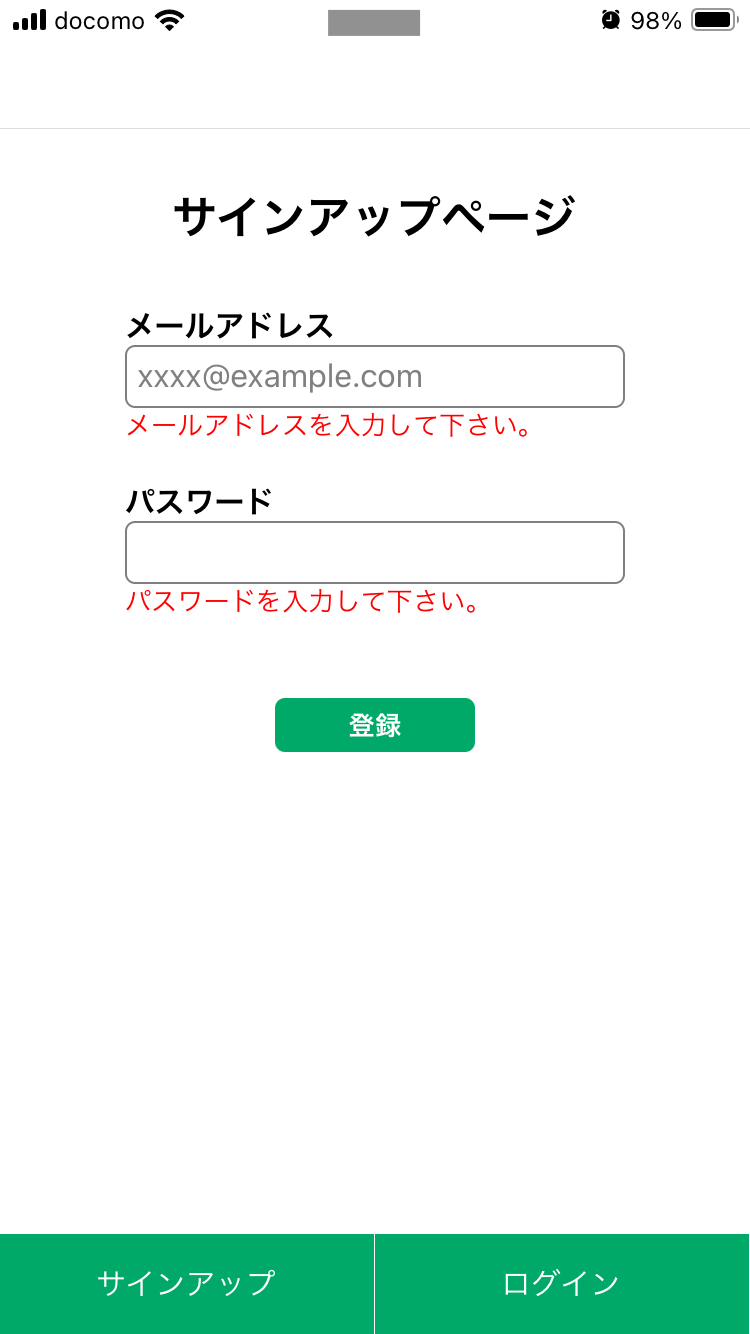
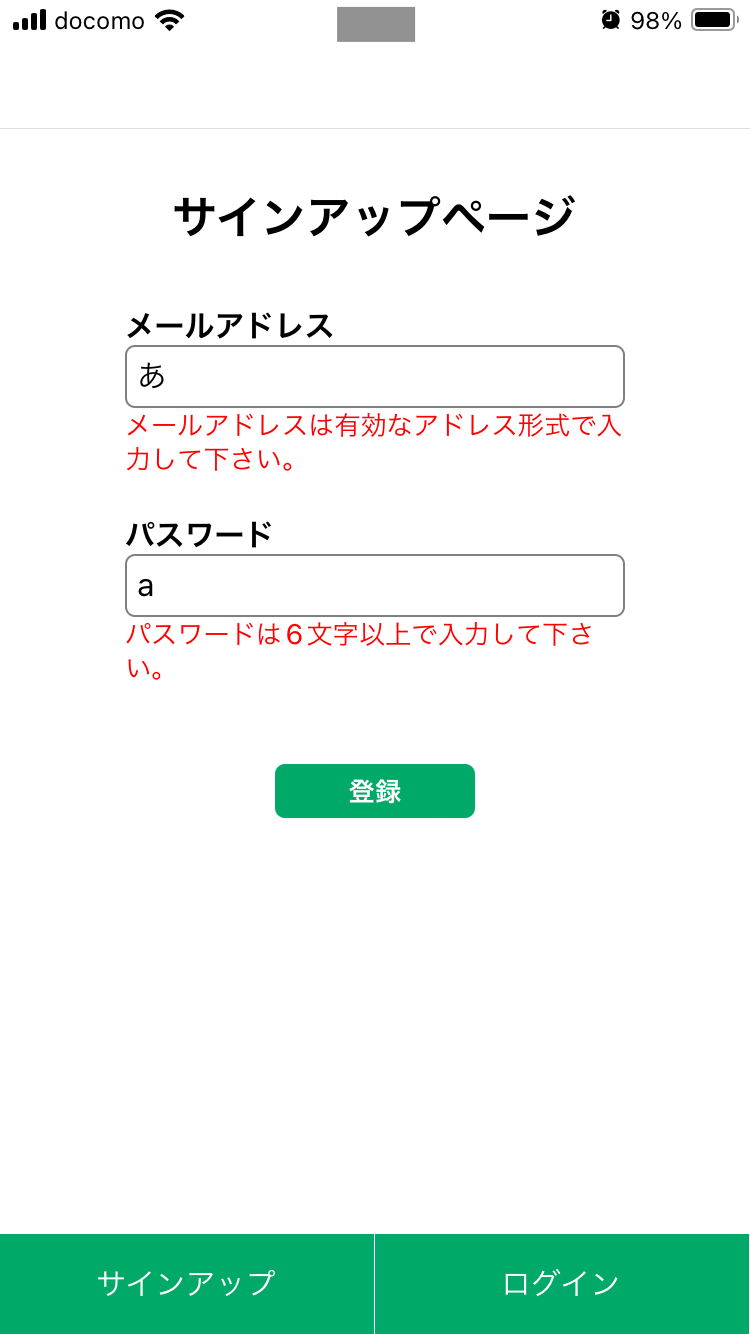
次にExpo Goで動作確認してみます。
以下のようにサインアップページで登録ボタンを押下時に、バリデーションチェックが有効になっていればOKです。
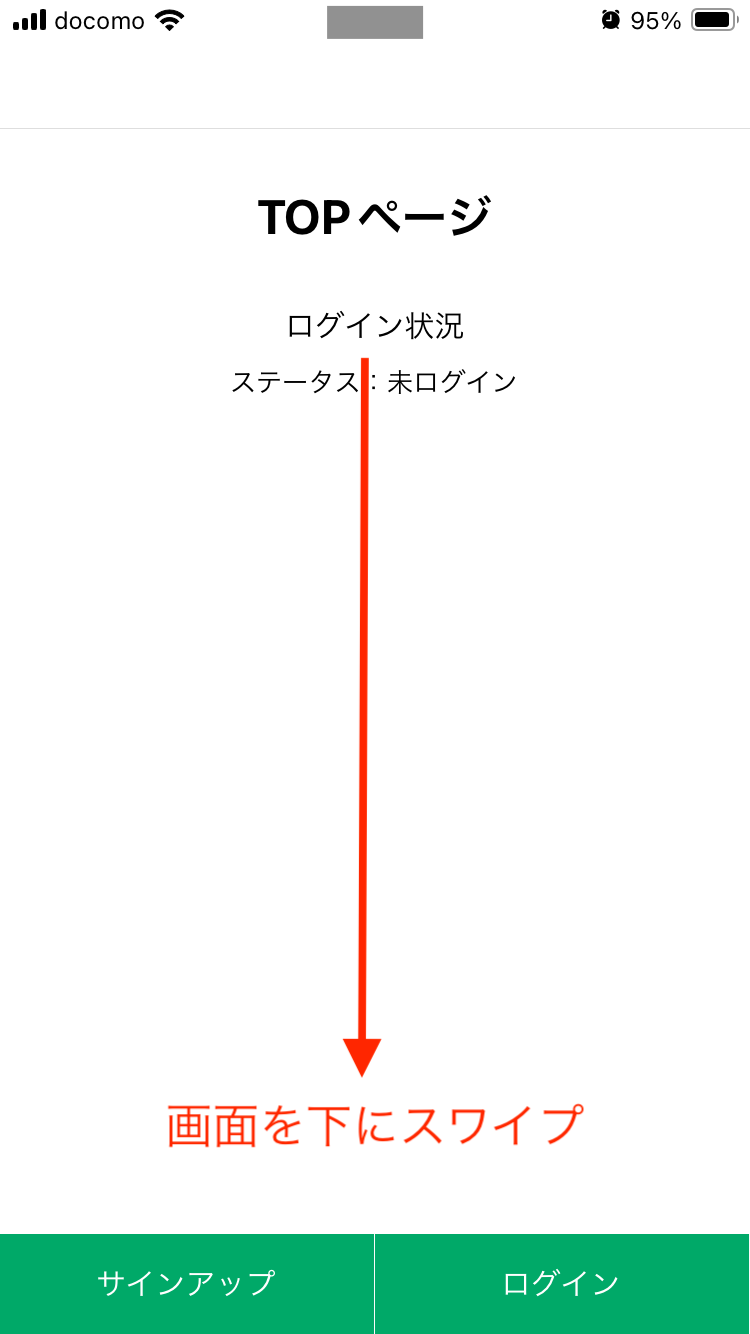
TOPページ画面を下スワイプした時の更新機能を付ける
次にスマホ操作用としてTOPページ画面を下スワイプした時に画面を更新させる機能を付けてみます。
ではTOPページのファイル「(top)/index.tsx」を次のように修正します。
import { View, Text, ScrollView, RefreshControl, Image, Dimensions, StyleSheet } from 'react-native'
import { useAuthContext } from '../../contexts/AuthContext'
import { useState, useCallback } from 'react'

// 外部API実行処理
const getCatImage = async () => {
    const url = "https://api.thecatapi.com/v1/images/search";

    try {

        const res = await fetch(url);

        return res.json();

    } catch (error) {
        if (error instanceof Error) {
            console.error(error.message);
        }

        console.log("データフェッチに失敗しました。");
        return;

        throw error;
    }
};

export default function Index() {
    const { firebaseUser } = useAuthContext();
    const [refreshing, setRefreshing] = useState(false);
    const [image, setImage] = useState<string>();
    const windowHeight = Dimensions.get('window').height;

    const styles = StyleSheet.create({
        container: {
            width: '100%',
            flex: 1,
            alignItems: 'center',
            backgroundColor: '#FFFFFF',
            height: windowHeight,
        },
        titleContainer: {
            justifyContent: 'center',
            marginTop: 30,
            marginBottom: 30,
        },
        titleText: {
            fontSize: 24,
            fontWeight: 'bold',
        },
        loginCheckContainer: {
            width: '100%',
            alignItems: 'center',
        },
        loginCheckTitle: {
            marginBottom: 10,
        },
        loginCheckTitleText: {
            fontSize: 16,
        },
        image: {
            marginTop: 50,
        },
    });

    // 画面を下スワイプした時の更新処理
    const onRefresh = useCallback(async () => {
        setRefreshing(true);

        // 猫画像を取得
        const data = await getCatImage();
        setImage(data[0].url);

        setRefreshing(false);
    }, []);

    return (
        <ScrollView
            refreshControl={
                <RefreshControl refreshing={refreshing} onRefresh={onRefresh}/>
            }
        >
            <View style={styles.container}>
                <View style={styles.titleContainer}>
                    <Text style={styles.titleText}>
                        TOPページ
                    </Text>
                </View>
                <View style={styles.loginCheckContainer}>
                    <View style={styles.loginCheckTitle}>
                        <Text style={styles.loginCheckTitleText}>
                            ログイン状況
                        </Text>
                    </View>
                    <View>
                        <Text>
                            ステータス:{firebaseUser ? "ログイン済み" : "未ログイン"}
                        </Text>
                        { firebaseUser &&
                            <View>
                                <Text>
                                    uid: { firebaseUser.uid }
                                </Text>
                                <Text>
                                    email: { firebaseUser.email }
                                </Text>
                                <Text>
                                    emailVerified: { String(firebaseUser?.emailVerified) }
                                </Text>
                            </View>
                        }
                    </View>
                </View>
                <Image
                    style={styles.image}
                    source={{ uri: image }}
                    height={250}
                    width={250}
                />
            </View>
        </ScrollView>
    );
};
※画面の下スワイプは「ScrollView」で実現しています。また、画像の取得には無料で使える外部APIを使わせてもらいました。
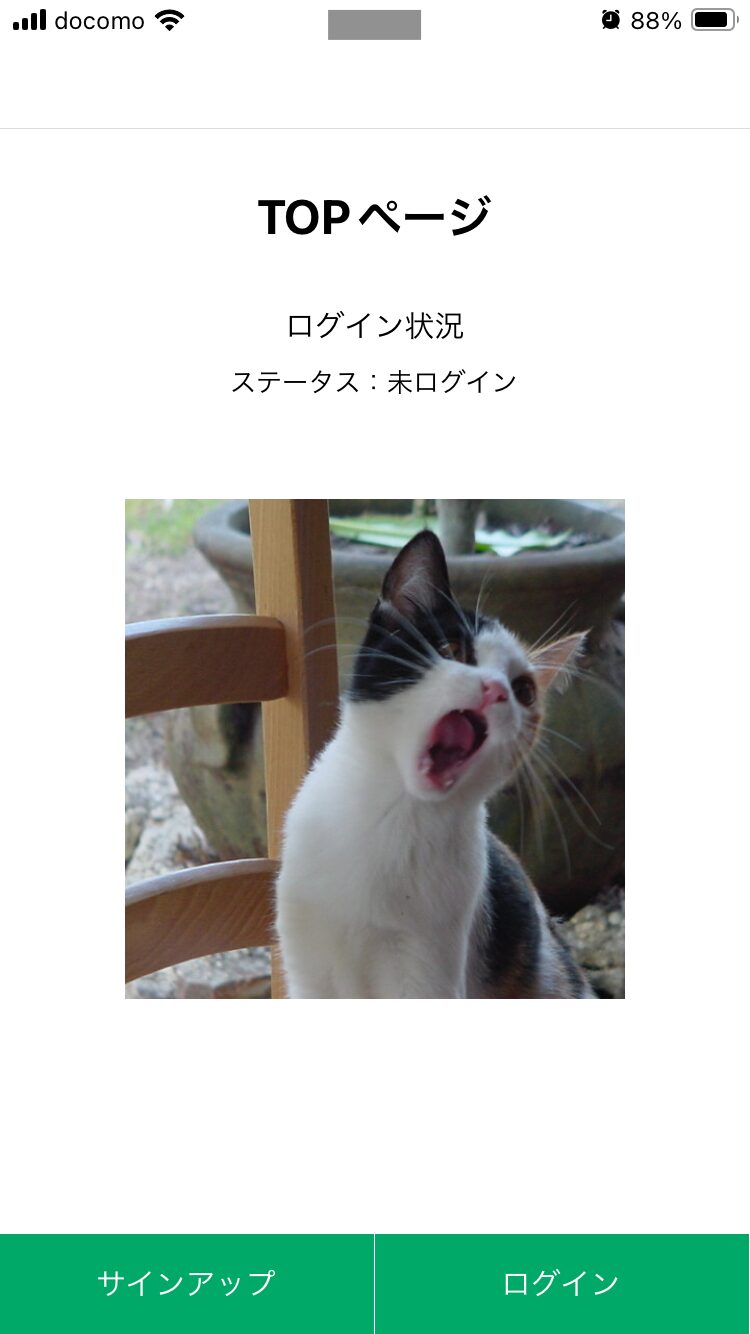
次にExpo Goで動作確認してみます。
以下のようにTOPページで下スワイプした際に画像が表示されればOKです。

AsyncStorageでデータを永続的に保存する
次にデータを永続的に保存する方法として「AsyncStorage」があるので使ってみます。
ではTOPページのファイル「(top)/index.tsx」を次のように修正します。
import { View, Text, ScrollView, RefreshControl, Image, Dimensions, StyleSheet } from 'react-native'
import { useAuthContext } from '../../contexts/AuthContext'
import { useState, useCallback, useEffect } from 'react'
import AsyncStorage from '@react-native-async-storage/async-storage'

// 外部API実行処理
const getCatImage = async () => {
    const url = "https://api.thecatapi.com/v1/images/search";

    try {

        const res = await fetch(url);

        return res.json();

    } catch (error) {
        if (error instanceof Error) {
            console.error(error.message);
        }

        console.log("データフェッチに失敗しました。");
        return;

        throw error;
    }
};

export default function Index() {
    const { firebaseUser } = useAuthContext();
    const [refreshing, setRefreshing] = useState(false);
    const [image, setImage] = useState<string>();
    const windowHeight = Dimensions.get('window').height;

    const styles = StyleSheet.create({
        container: {
            width: '100%',
            flex: 1,
            alignItems: 'center',
            backgroundColor: '#FFFFFF',
            height: windowHeight,
        },
        titleContainer: {
            justifyContent: 'center',
            marginTop: 30,
            marginBottom: 30,
        },
        titleText: {
            fontSize: 24,
            fontWeight: 'bold',
        },
        loginCheckContainer: {
            width: '100%',
            alignItems: 'center',
        },
        loginCheckTitle: {
            marginBottom: 10,
        },
        loginCheckTitleText: {
            fontSize: 16,
        },
        image: {
            marginTop: 50,
        },
    });

    // 画面を下スワイプした時の更新処理
    const onRefresh = useCallback(async () => {
        setRefreshing(true);

        // 猫画像を取得
        const data = await getCatImage();
        setImage(data[0].url);

        // AsyncStorageにデータ保存
        AsyncStorage.setItem('image', data[0].url);

        setRefreshing(false);
    }, []);

    useEffect(() => {
        (async() => {
            const imageUrl = await AsyncStorage.getItem('image');
            if (imageUrl) {
                setImage(imageUrl);
            };
        })();
    }, []);
    return (
        <ScrollView
            refreshControl={
                <RefreshControl refreshing={refreshing} onRefresh={onRefresh}/>
            }
        >
            <View style={styles.container}>
                <View style={styles.titleContainer}>
                    <Text style={styles.titleText}>
                        TOPページ
                    </Text>
                </View>
                <View style={styles.loginCheckContainer}>
                    <View style={styles.loginCheckTitle}>
                        <Text style={styles.loginCheckTitleText}>
                            ログイン状況
                        </Text>
                    </View>
                    <View>
                        <Text>
                            ステータス:{firebaseUser ? "ログイン済み" : "未ログイン"}
                        </Text>
                        { firebaseUser &&
                            <View>
                                <Text>
                                    uid: { firebaseUser.uid }
                                </Text>
                                <Text>
                                    email: { firebaseUser.email }
                                </Text>
                                <Text>
                                    emailVerified: { String(firebaseUser?.emailVerified) }
                                </Text>
                            </View>
                        }
                    </View>
                </View>
                <Image
                    style={styles.image}
                    source={{ uri: image }}
                    height={250}
                    width={250}
                />
            </View>
        </ScrollView>
    );
};
※例えばアプリだとブラウザのようにCookieをそのまま使えなかったりすると思うので、そういう場合はAsyncStorageにCookieの値を保存したりして使うとよさそうです。尚、AsyncStorageはアプリ用なのでWeb版からは確認できないのでご注意下さい。(Expo Goで確認して下さい。)
次にExpo Goで動作確認してみます。
まずは先ほどと同様にTOPページ画面で下スワイプし、画像を取得します。
画像を取得できたら、そのままアプリを閉じて終了して下さい。
次にもう一度アプリを再起動してからTOPページを確認し、先ほど取得したのと同じ画像が表示されていればOKです。
最後に
今回はExpo(React Native)によるアプリ開発方法についてまとめました。
実際のアプリ開発では、上記に加えて本番環境へのデプロイ・リリース作業等も発生すると思いますが、そこを試そうとすると少し手間がかかる(Apple Developer Programに加入など)ので、また別の機会にやれたらなという感じです。
Next.js(React)の経験がある状態で初めてExpo(React Native)を触ってみましたが、コンポーネントの作成はReact Native用の書き方をする必要があるものの、それ以外の処理についてはNext.js(React)の経験が活きたので、よく言われているNext.js(React)で経験してきた資産を活かせるというのは間違いないです。
Expo(React Native)の基本的な部分は押さえられたので、興味がある方はぜひ参考にしてみて下さい。
各種SNSなど、チャンネル登録やフォローをしていただけると励みになるので、よければぜひお願いします!
Tomoyuki
最新記事 by Tomoyuki (全て見る)
- 【無料】Cloudflare WorkersでAPIを定期実行できるぞ! - 2024年10月11日
- Go言語(Golang)専門の技術ブログ「Golang-Tech」を開設!? - 2024年9月26日
- 【2024年】モンハンワイルズの推奨スペックとおすすめのゲーミングPCを紹介! - 2024年9月26日


コメントを残す